When developing a product application, a faster feedback loop is essential. The feedback provided in an application does not only align with developers. For example, if your application supports multiple regions and each region has a local version, you might want to work with translators to support those multiple languages. You can't give a JSON file to the translator and expect them to understand and write code. Communication between a developer team and the team of translators would require too much back and forth and modifications in the product.
In this tutorial, let's look at how you can ease the process in such a case by using FlyCode to update your React app on the "fly". FlyCode is a product editor platform that allows your developer team to work with teams whose scope is in a particular domain without the requirement of writing code.
It also enables a faster feedback loop cycle that allows the developer team to release their product faster. In the React app, we will use the react-i18next library to add support for switching between different languages.
Prerequisites
To follow this tutorial, you will need:
- Node.js
14.x.xor above installed - A basic understanding of React
- FlyCode account
- GitHub account
The source code for the example application is available on GitHub.
Setting up a React app
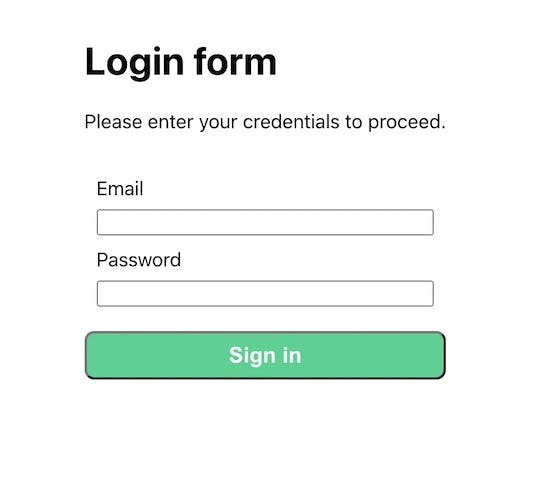
Let's start by creating an example React app. We will keep the scope of the app small to cover the basics and for brevity. The example app will contain a login page with two input fields and a button. The text of these input fields and the button will be available for translation into other languages.
Open up a terminal window and create a new React project using the create-react-app toolchain.
npx create-react-app react-login-form

# after the project directory is created
# navigate inside it
cd react-login-form
After navigating inside the project directory, you will come across the familiar src/ directory, part of the pre-defined folder structure that create-react-app creates. This directory contains the source code of your React app. As an example, let's build a general login page in the src/App.js file.
Open up the App.js file and add the following code snippet:
import './App.css';

function App() {
  const handleSubmit = event => {
    event.preventDefault();
    alert('Your form is submitted!');
  };

  return (
    <div className="app">
      <div className="form">
        <h1>Login form</h1>
        <p className="subtitle">Please enter your credentials to proceed.</p>
        <form onSubmit={handleSubmit}>
          <div className="input-container">
            <label>Email</label>
            <input type="text" name="email" required />
          </div>
          <div className="input-container">
            <label>Password</label>
            <input type="password" name="password" required />
          </div>
          <button className="button-container" type="submit">
            <p className="button-text">Sign in</p>
          </button>
        </form>
      </div>
    </div>
  );
}

export default App;
Also, add the following CSS styles to the App.css file:
.app {
  display: flex;
  margin-top: 20px;
  justify-content: center;
  height: 100vh;
  background-color: #fff;
}

.subtitle {
  padding-bottom: 20px;
}

.button-container {
  display: flex;
  justify-content: center;
  align-items: center;
  border-radius: 8px;
  background: #01d28e;
  width: 100%;
  height: 40px;
  margin-top: 20px;
  padding: 10px 20px;
}

.button-text {
  color: #fff;
  font-size: 18px;
  font-weight: bold;
}

.input-container {
  display: flex;
  flex-direction: column;
  gap: 8px;
  margin: 10px;
}

.picker {
  display: flex;
  margin-top: 10px;
  padding: 10px;
  flex-direction: row;
}

.picker-title {
  font-size: 18px;
  font-weight: bold;
  margin-right: 10px;
}
Run the yarn start command from the terminal window to see the login page in action. You will see the following login page in the browser window:
Integrating i18n framework to add internationalization
In this section, let's install and integrate the react-i18next library in the React app. Open up the terminal window and run the following command:
yarn add react-i18next i18next i18next-http-backend
The next step is to create an i18n.js file in the src/ directory. This file contains the initial configuration for i18next. Import both i18next and react-i18next libraries and add the following code snippet to the file:
import i18n from 'i18next';
import { initReactI18next } from 'react-i18next';

i18n.use(initReactI18next).init({
  fallbackLng: 'en',
  debug: true,
  interpolation: {
    escapeValue: false, // not needed for react as it escapes by default
  },
});

export default i18n;
The i18n.use() method takes an argument. In the above code snippet, we pass the initReactI18next method from the react-i18next library. This method is responsible for setting up the i18next instance with the configuration we have defined in the i18n.init() method and will make the configuration available for all the components in the React application.
Next, import the i18n.js file into the src/index.js file:
import React from 'react';
import ReactDOM from 'react-dom/client';
import './index.css';
import App from './App';

// import i18n.js file
import './i18n';

const root = ReactDOM.createRoot(document.getElementById('root'));
root.render(
  <React.StrictMode>
    <App />
  </React.StrictMode>
);
Creating translation files for text in the React app
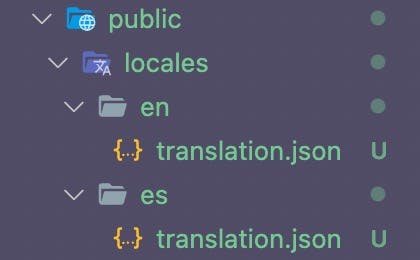
Let's add some translations. We will use two locales, one for English and another for Spanish. Each will contain the text for the login page. To add translation files, open structure the public directory as shown below:
Then, add the following code snippet en/translation.json file:
{
  "formTitle": "Login Form",
  "description": "Please enter your credentials to proceed.",
  "buttonText": "Sign in"
}
And for the es/translation.json file:
{
  "formTitle": "Formulario sesión",
  "description": "Ingrese sus credenciales para continuar.",
  "buttonText": "Cerrar sesión"
}
Notice that in both JSON files, each translation has a key. This key is used in a React component to display the translated text. Also, note that some of the translated text in the above code snippet is inaccurate. This is intentional. When we integrate FlyCode with our React app, we will rectify this issue.
Since we are using multiple translation files, we will need to update the i18n.js file. Import the package i18next-http-backend and update the file as shown below:
import i18n from 'i18next';
import { initReactI18next } from 'react-i18next';
import Backend from 'i18next-http-backend';

i18n
  .use(Backend)
  .use(initReactI18next)
  .init({
    fallbackLng: 'en',
    debug: true,
    interpolation: {
      escapeValue: false, // not needed for react as it escapes by default
    },
  });

export default i18n;
Also, update the index.js file to use React Suspense component that will display a loading message in case the translation files are not loaded.
import React, { Suspense } from 'react';
import ReactDOM from 'react-dom/client';
import './index.css';
import App from './App';

// import i18n.js file
import './i18n';

export default function WrappedApp() {
  return (
    <Suspense fallback="Loading...">
      <App />
    </Suspense>
  );
}

const root = ReactDOM.createRoot(document.getElementById('root'));
root.render(
  <React.StrictMode>
    <App />
  </React.StrictMode>
);
Next, let's use the useTranslation hook to access the translated text in the React app. The hook provides a t function that takes a translation key as the parameter.
Open the App.js file and import the hook:
import { useTranslation } from 'react-i18next';
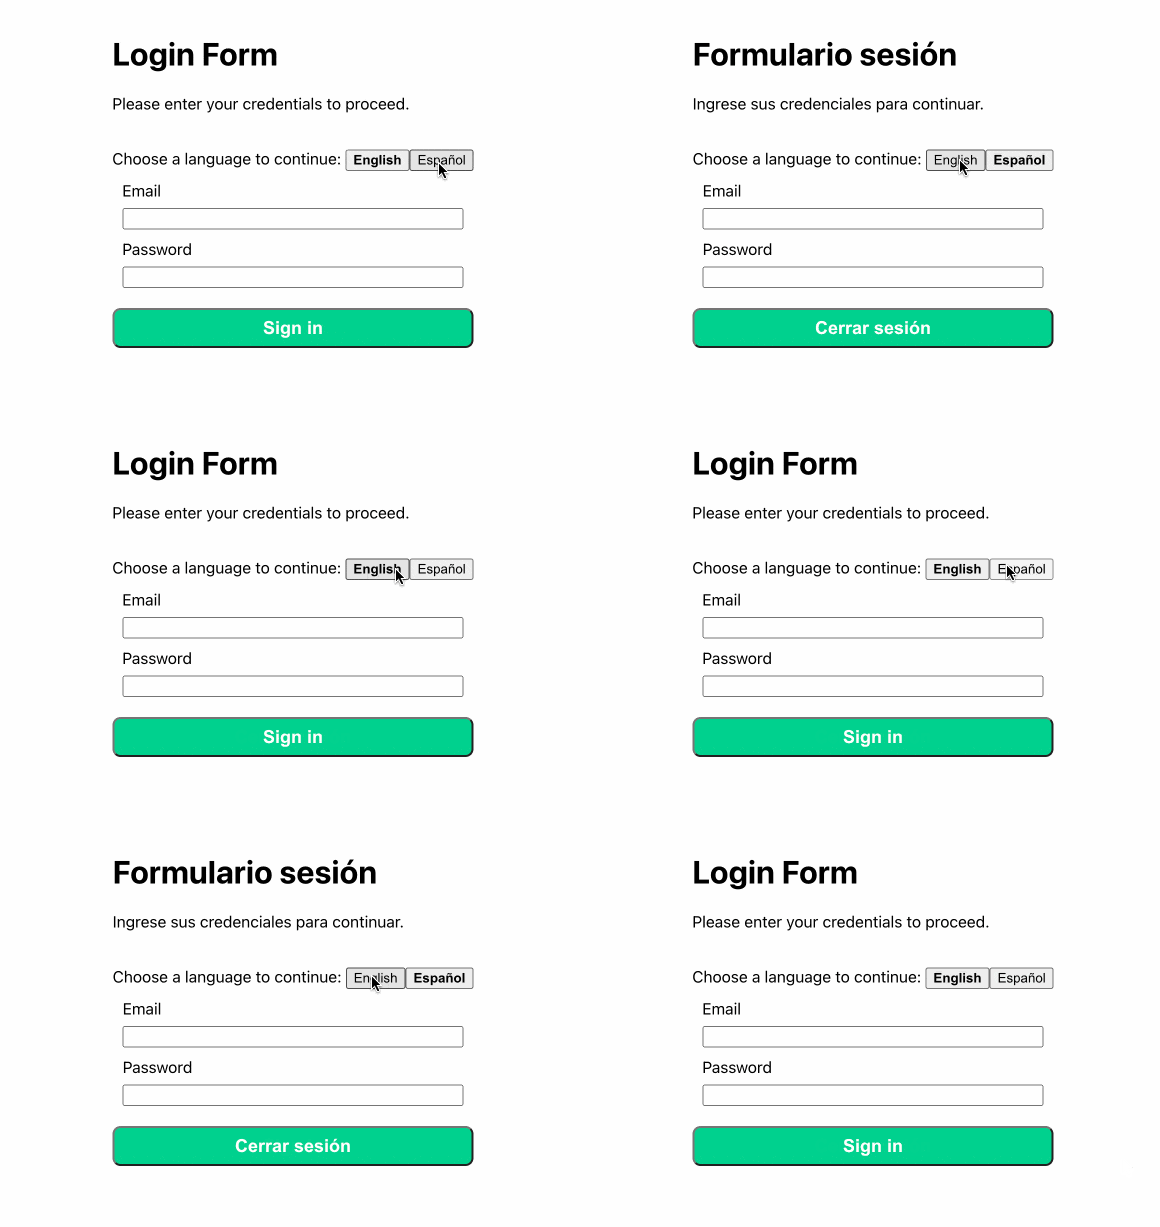
Let's also create a langs object containing the locales' keys. We will map this object to render the language buttons in the React app. These buttons will allow the app user to switch between the languages.
Here is the complete modified App.js file:
import { useTranslation } from 'react-i18next';

import './App.css';

const langs = {
  en: { nativeName: 'English' },
  es: { nativeName: 'Español' },
};

function App() {
  const { t, i18n } = useTranslation();

  const handleSubmit = event => {
    event.preventDefault();
    alert('Your form is submitted!');
  };

  return (
    <div className="app">
      <div className="form">
        <h1>{t('formTitle')}</h1>
        <p className="subtitle">{t('description')}</p>
        <div>
          Choose a language to continue:{' '}
          {Object.keys(langs).map(lang => (
            <button
              key={lang}
              style={{
                fontWeight: i18n.resolvedLanguage === lang ? 'bold' : 'normal',
              }}
              type="submit"
              onClick={() => i18n.changeLanguage(lang)}
            >
              {langs[lang].nativeName}
            </button>
          ))}
        </div>
        <form onSubmit={handleSubmit}>
          <div className="input-container">
            <label>Email</label>
            <input type="text" name="email" required />
          </div>
          <div className="input-container">
            <label>Password</label>
            <input type="password" name="password" required />
          </div>
          <button className="button-container" type="submit">
            <p className="button-text">{t('buttonText')}</p>
          </button>
        </form>
      </div>
    </div>
  );
}

export default App;
To see the changes action, run the yarn start command from the terminal window:
Now that the React example app is complete let's add it as a repository on GitHub so that in the next step, we can integrate FlyCode.
Integrating FlyCode with the React app
Before integrating FlyCode with the GitHub repository, please create an account with FlyCode and link your GitHub account.
When creating a new account, FlyCode will ask you to create an organization. An organization on FlyCode is similar to a workspace where you can import and keep track of different projects and applications.
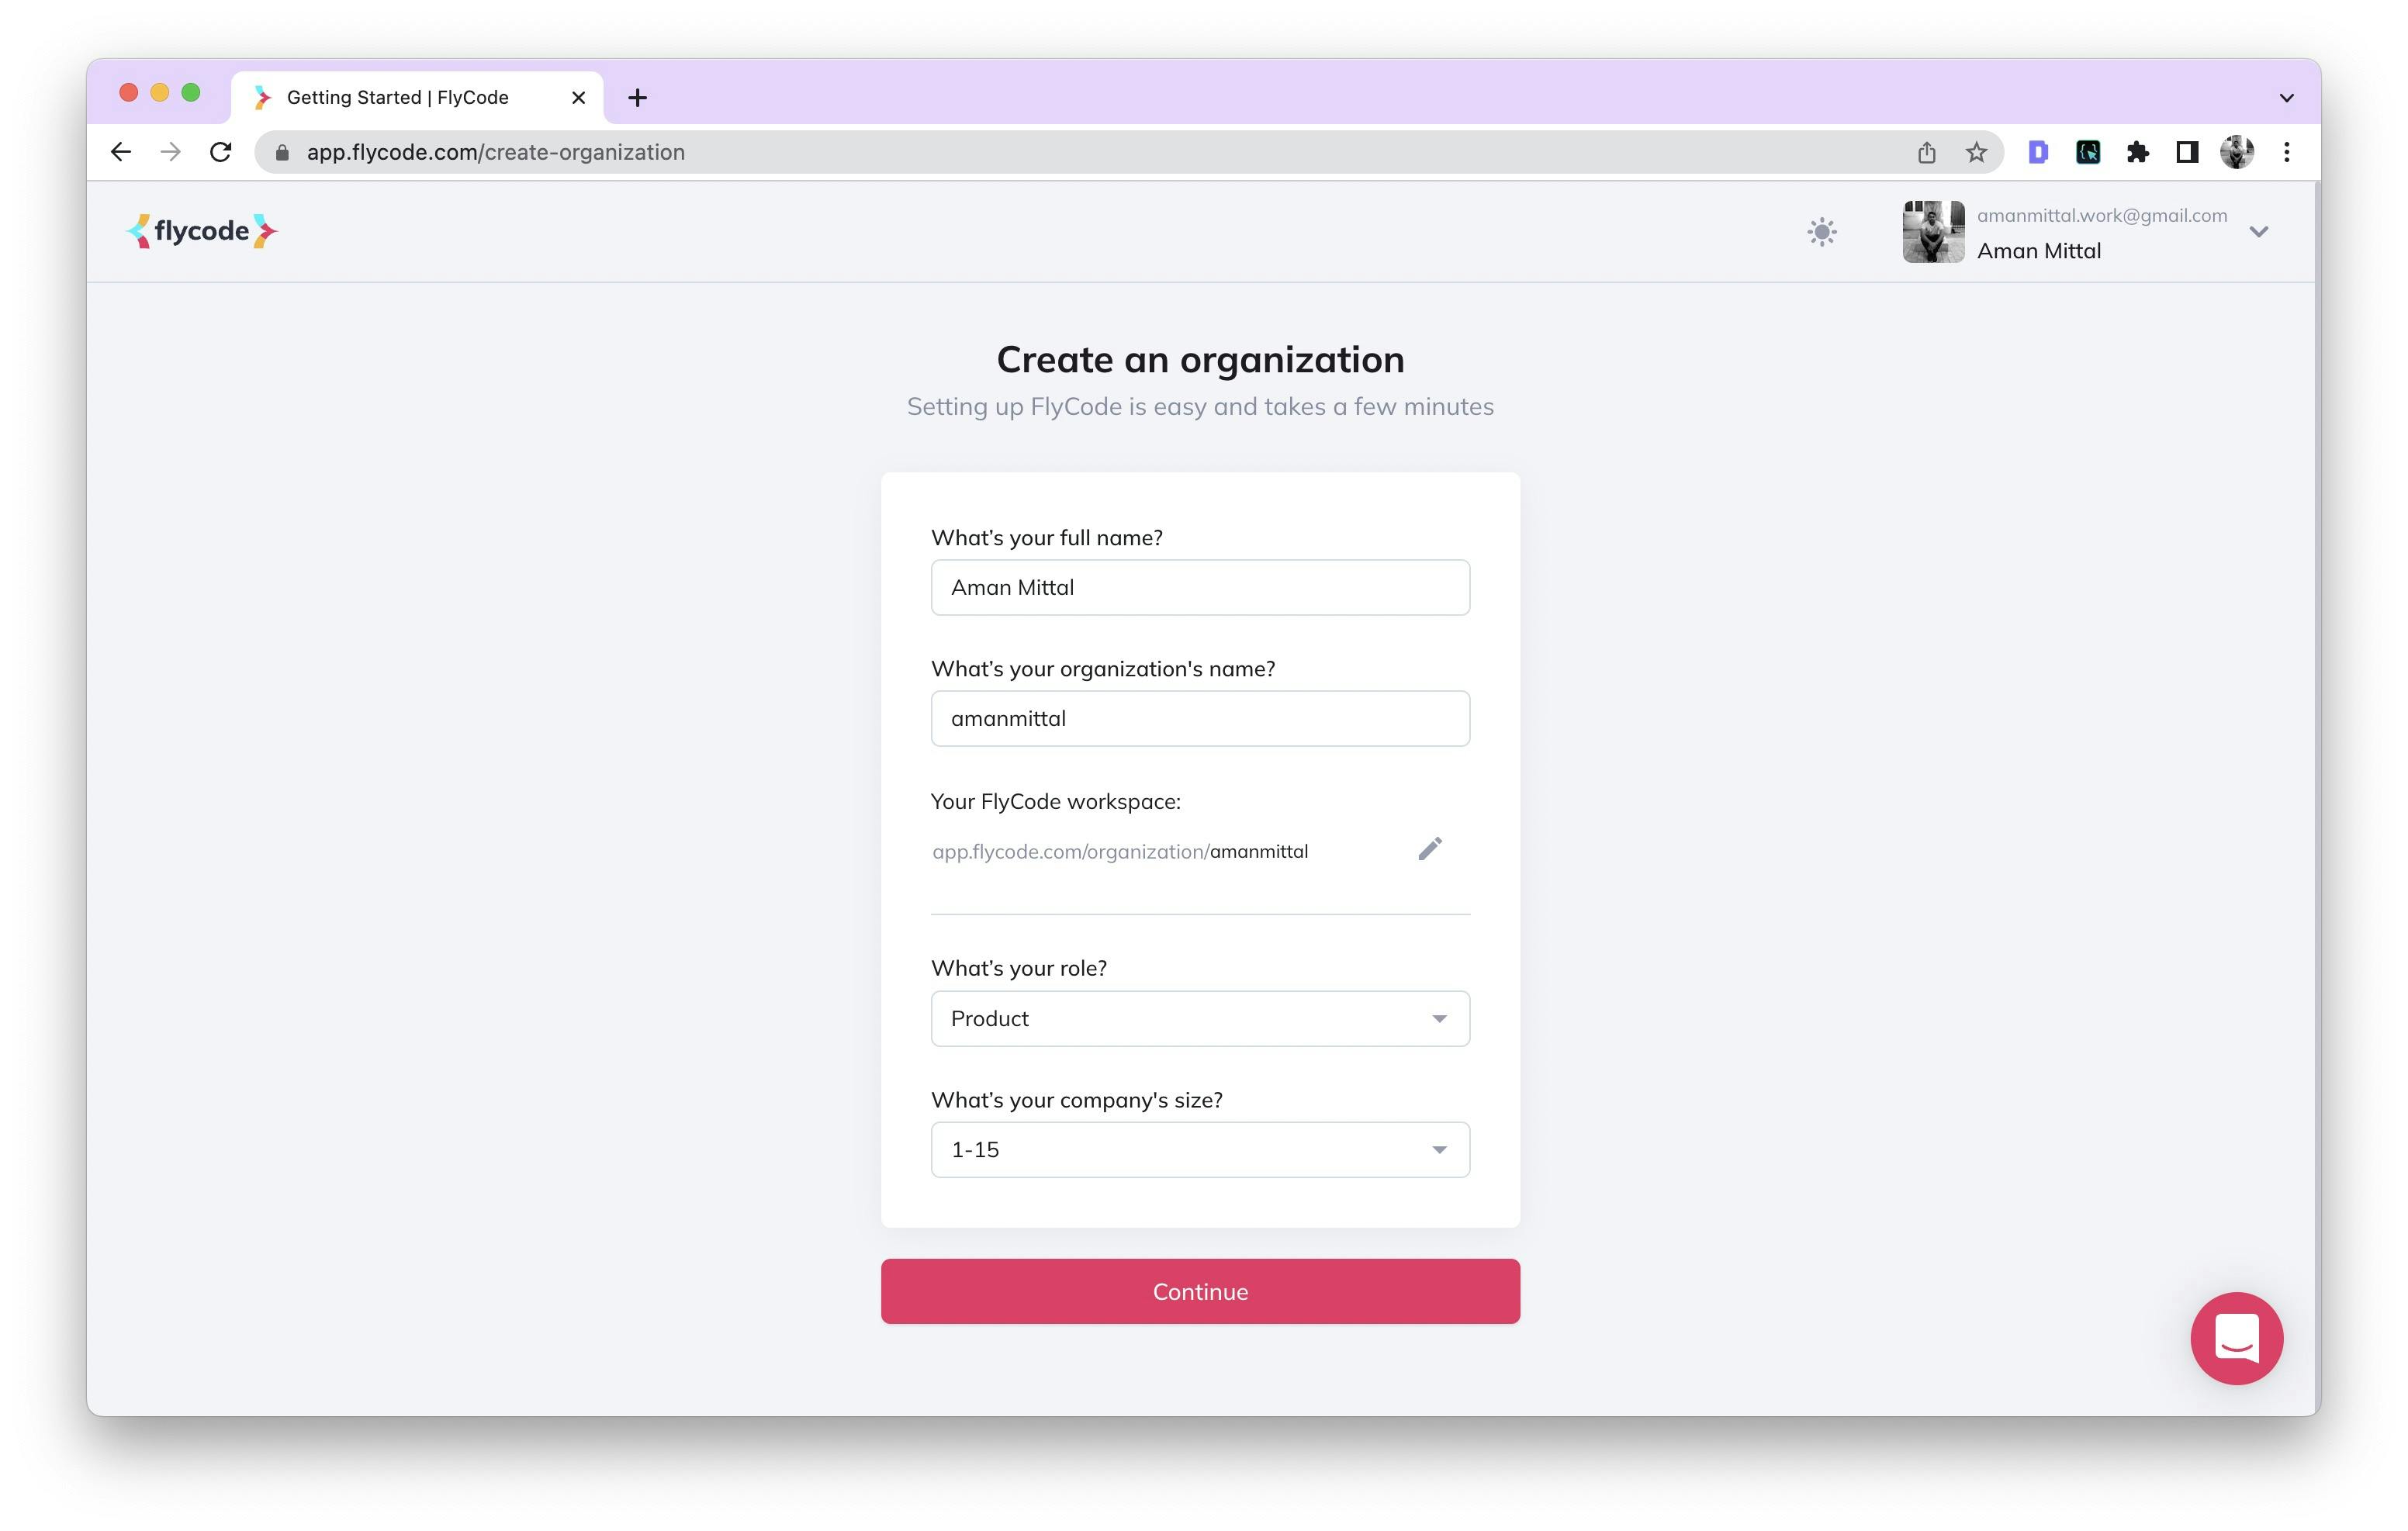
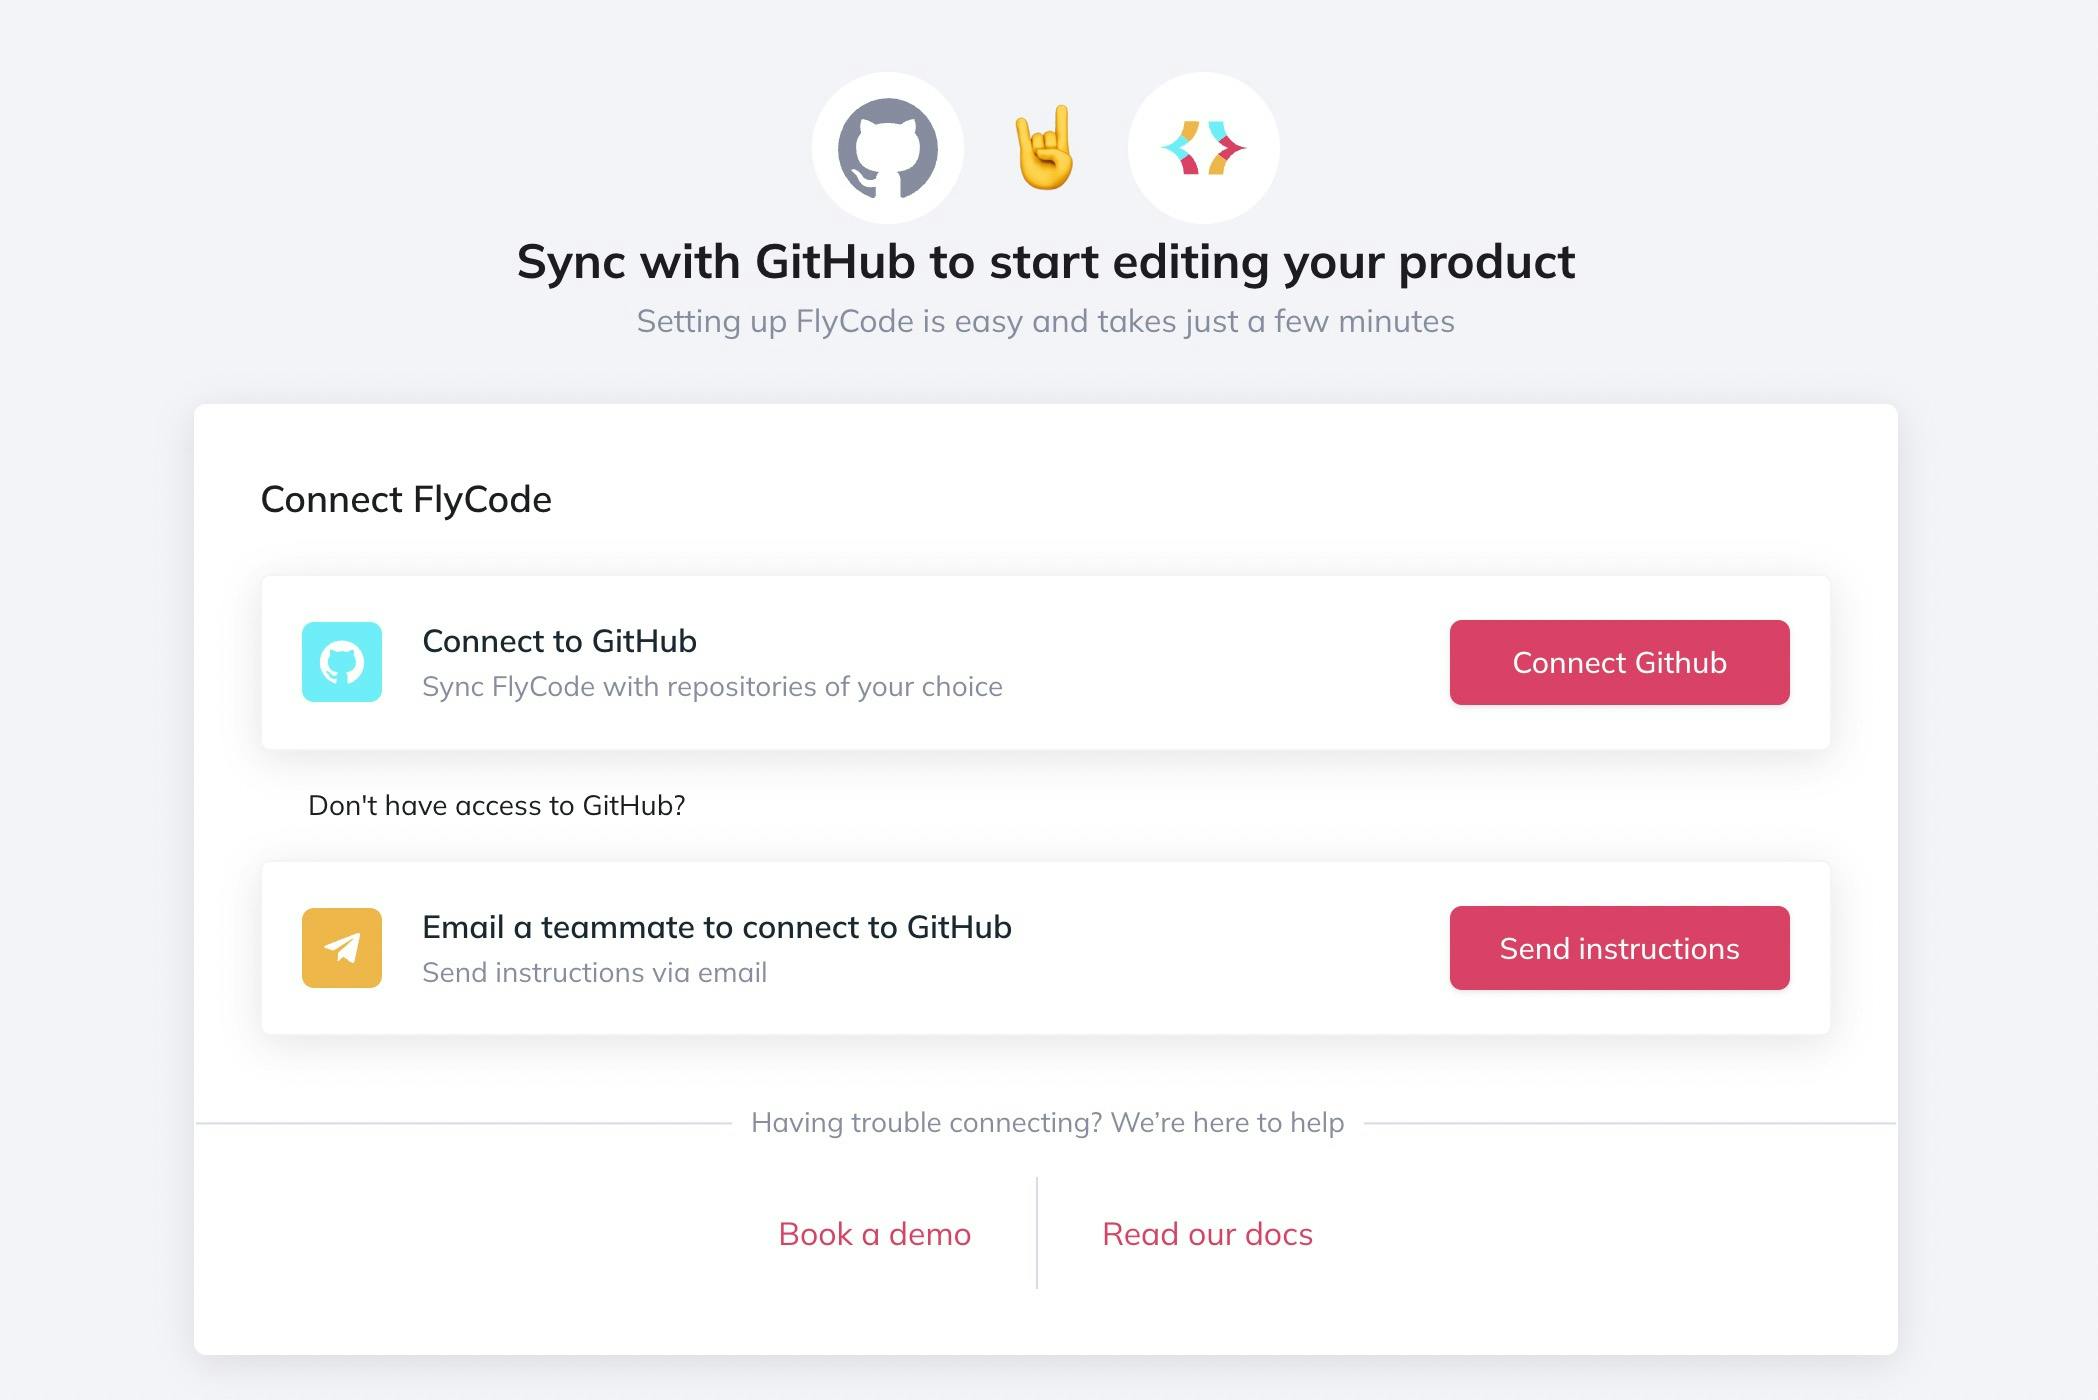
After filling out the details (as shown in the above form), press "Continue". For example, after creating an organization, you will see be directed to another page where you can connect your GitHub account with the FlyCode account. Click the button "Connect to GitHub".
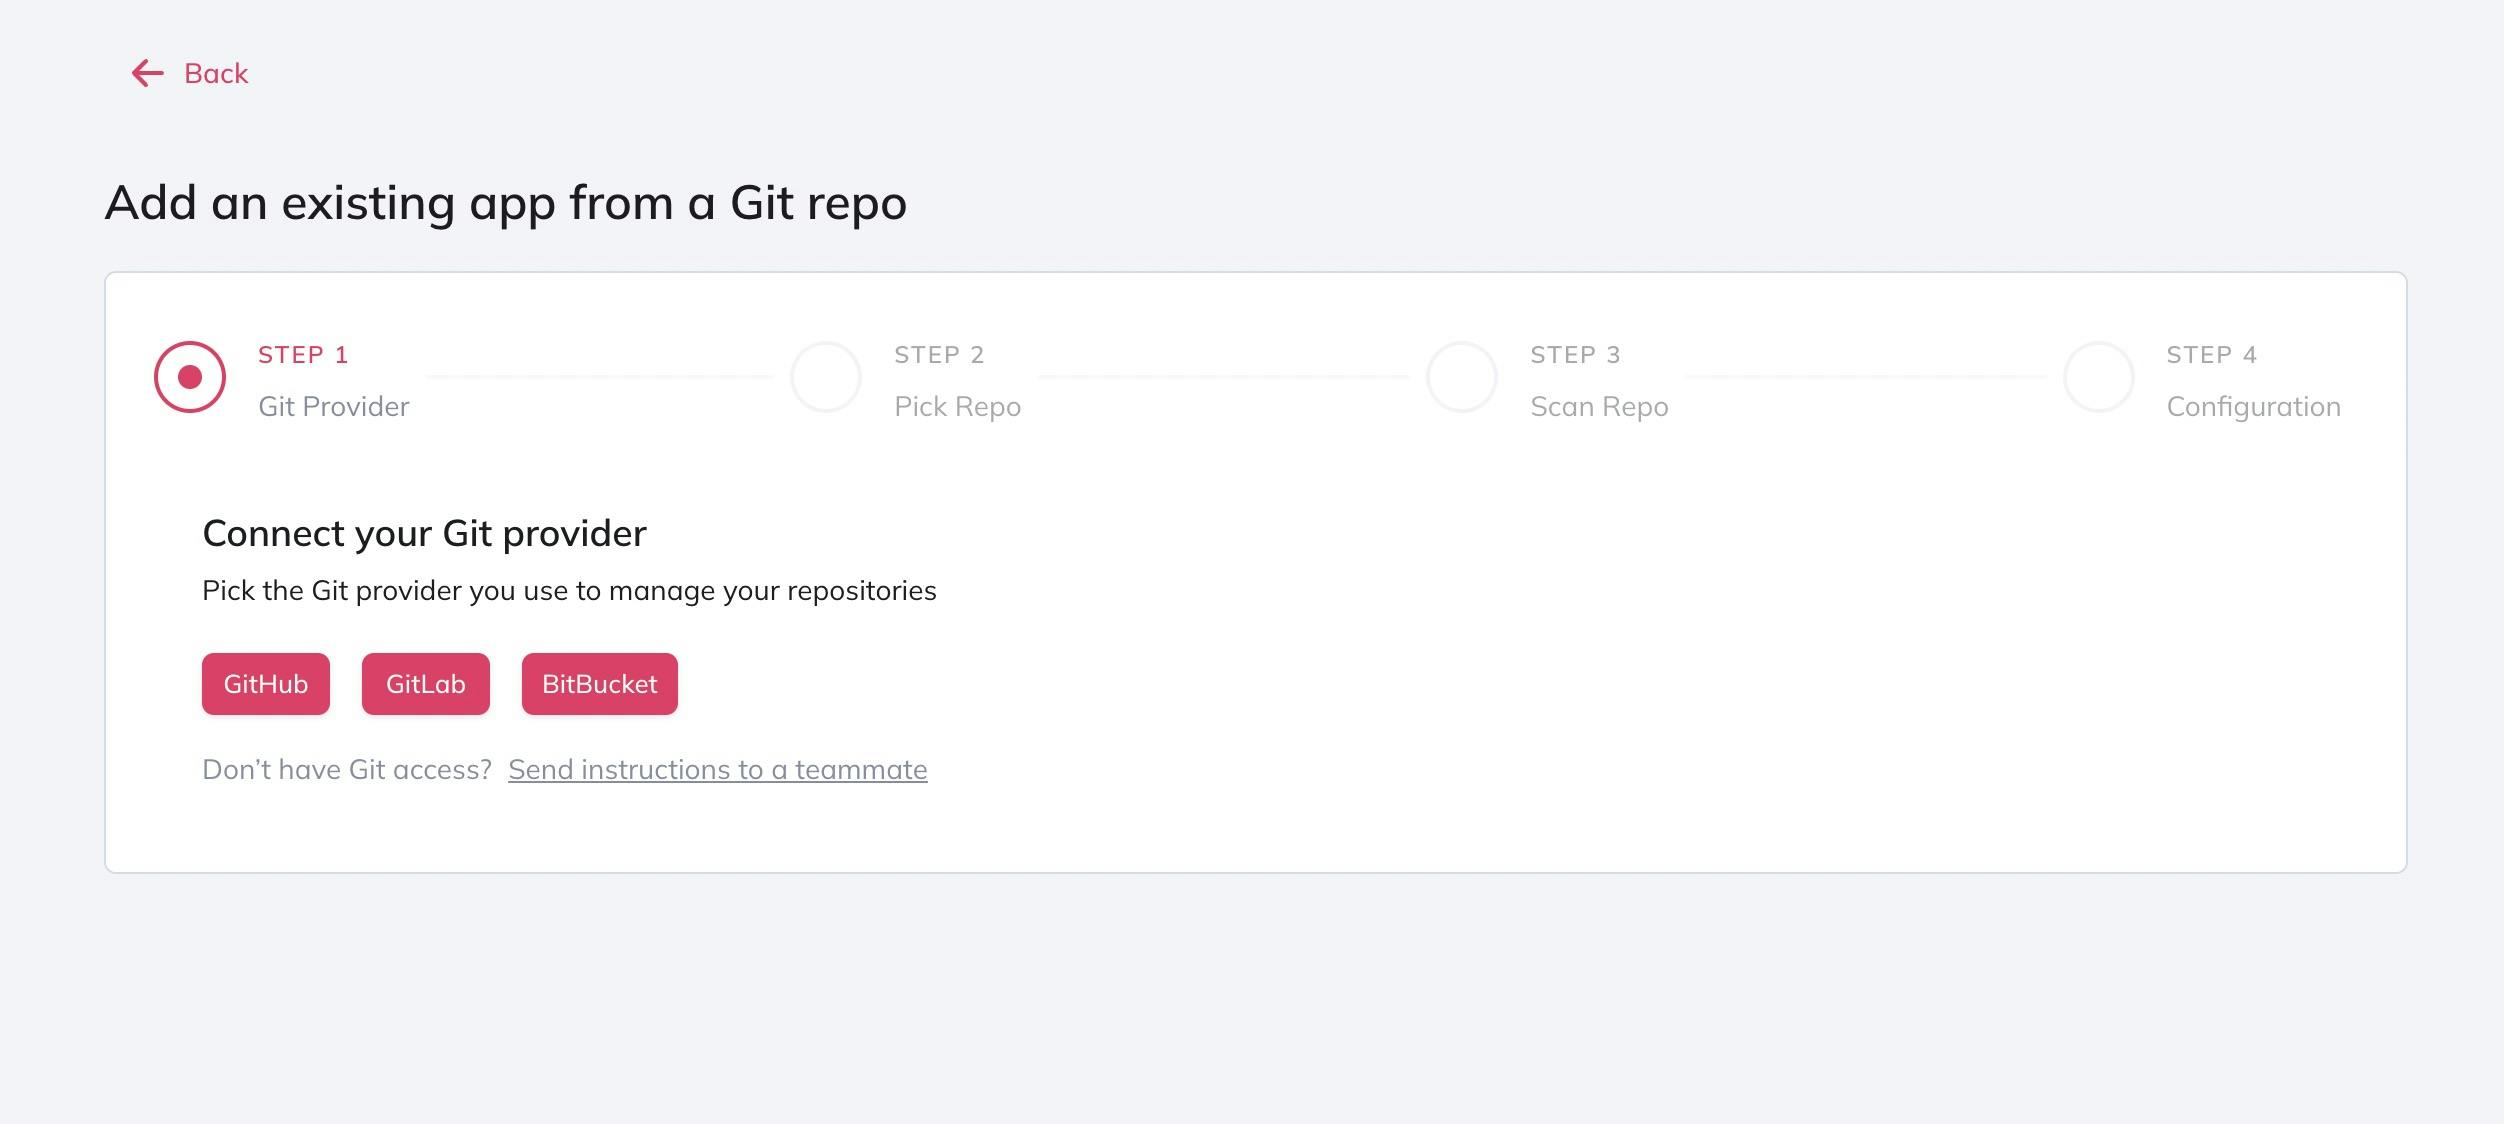
This will prompt you to select a Git provider. For the example app, we are going to select GitHub.
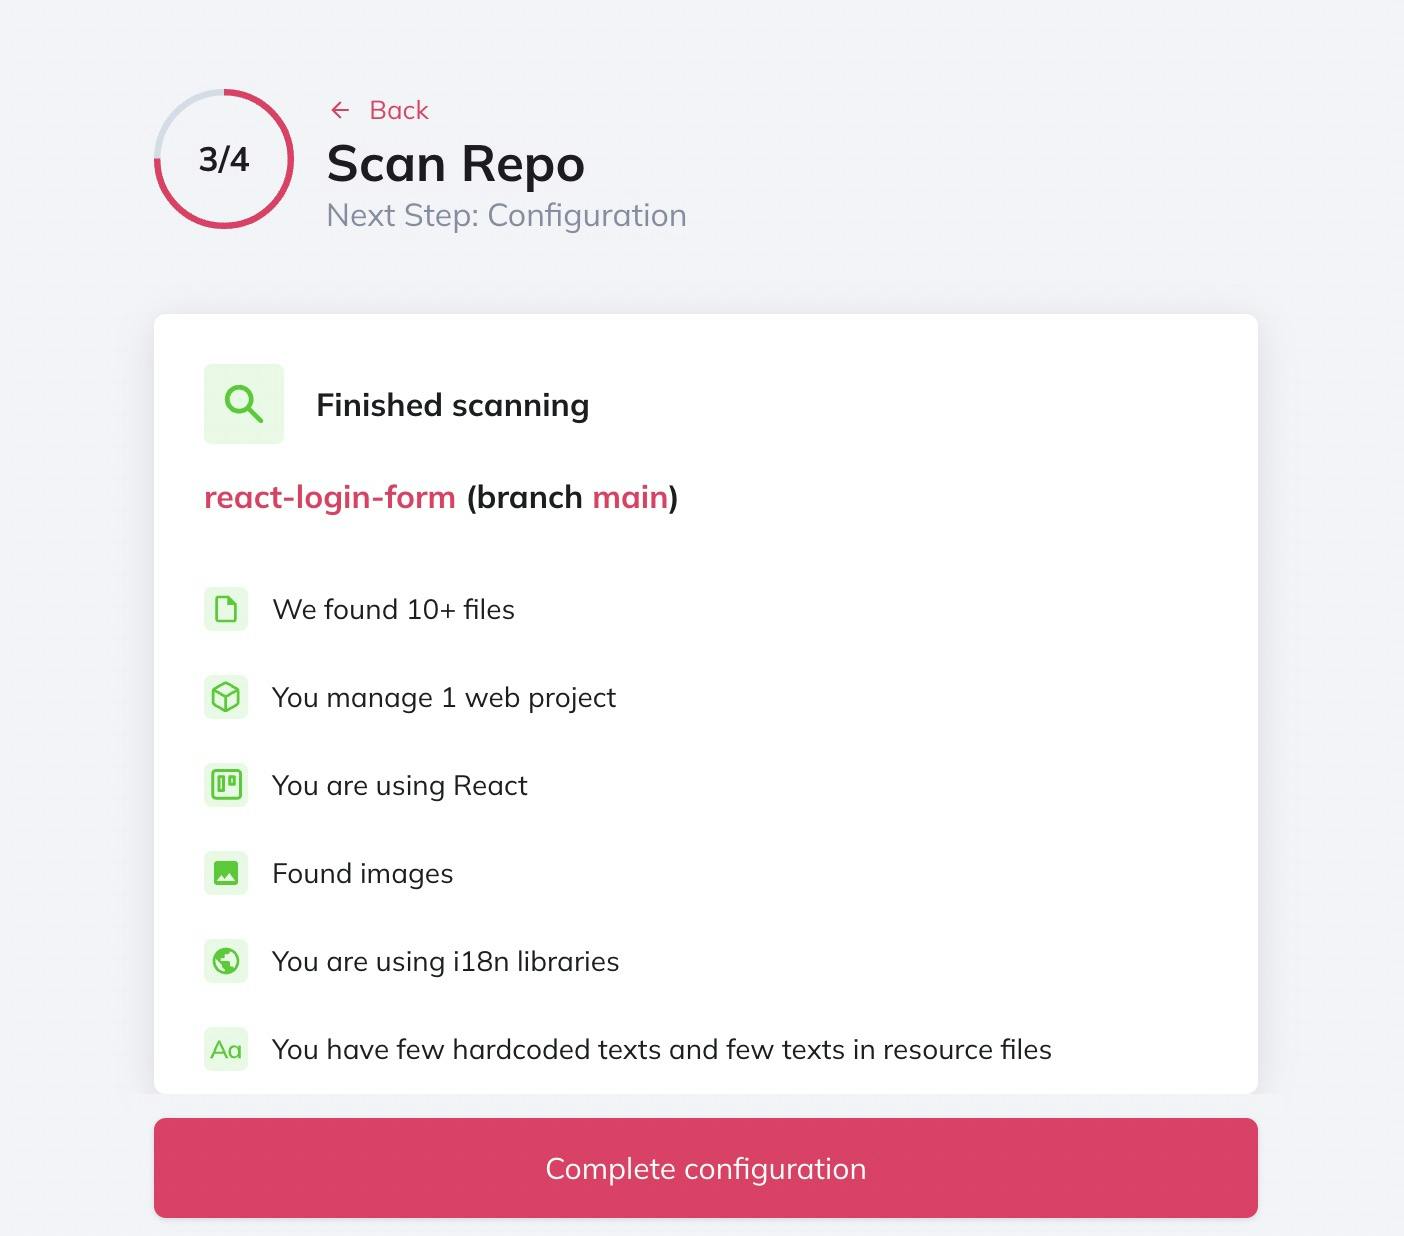
After selecting the provider, in the next step, it will open a popup where you can select a specific repository to connect with FlyCode or all repositories. For this tutorial, we will select the specific React app repo we uploaded to GitHub in the previous step. After that, FlyCode will automatically detect whether your React app is using i18n libraries or not.
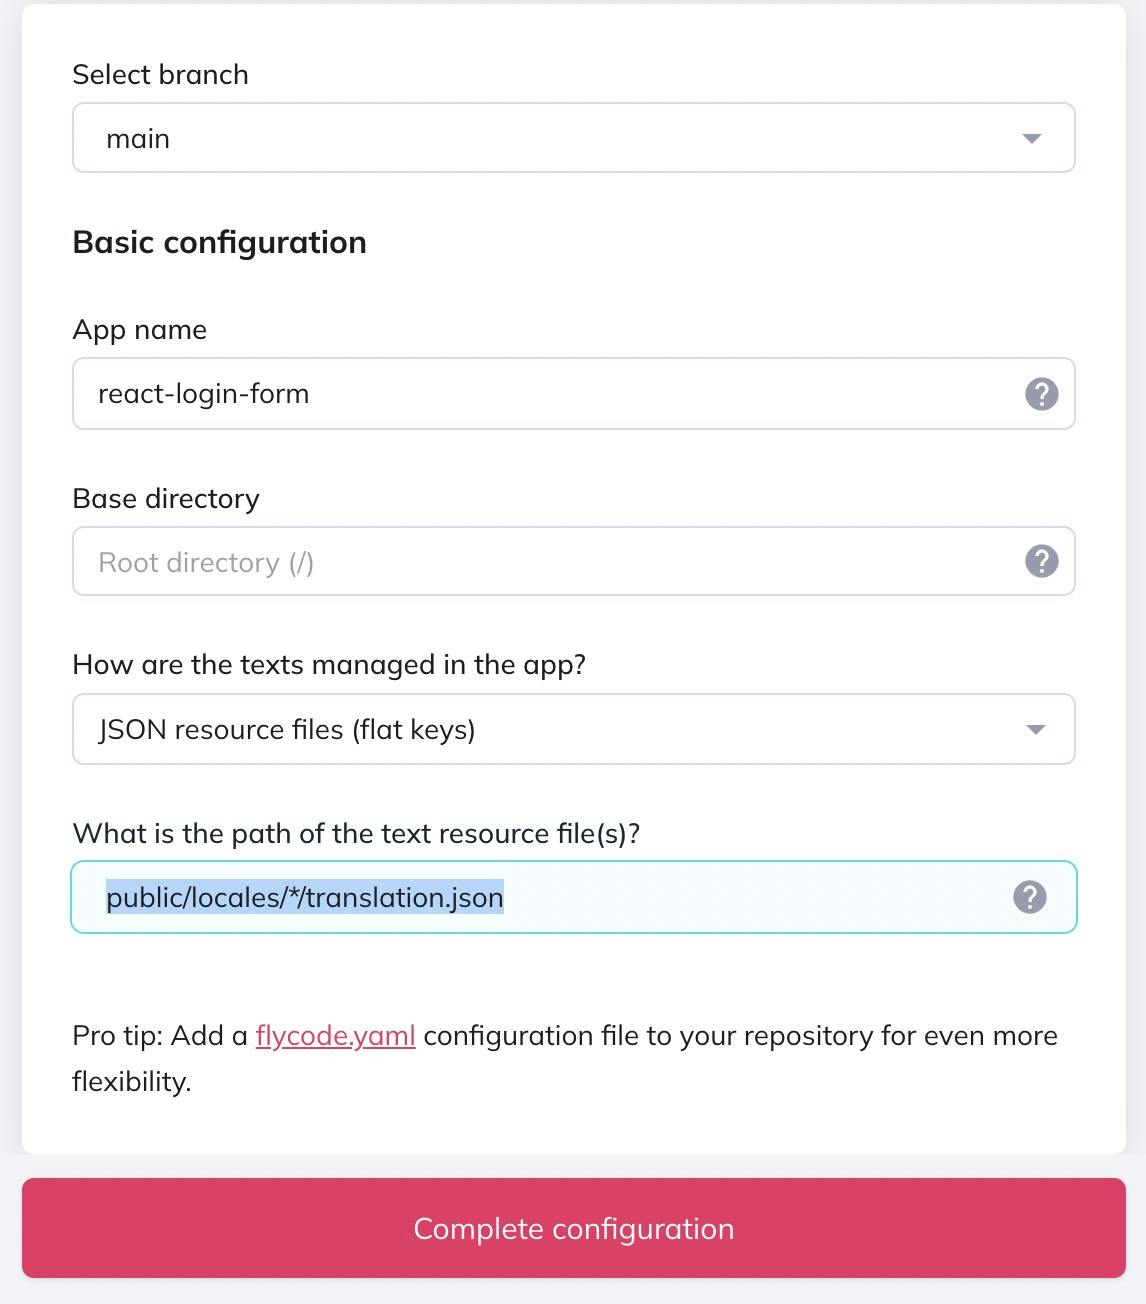
In the next step, in Basic configuration, when asked for "What is the path for a text file(s)?", select public/locales/*/translation.json from the dropdown menu.
Next, FlyCode will send a PR to your GitHub repository to add the .flycode.yaml file. Merge that PR. This file will sync your React project with FlyCode.
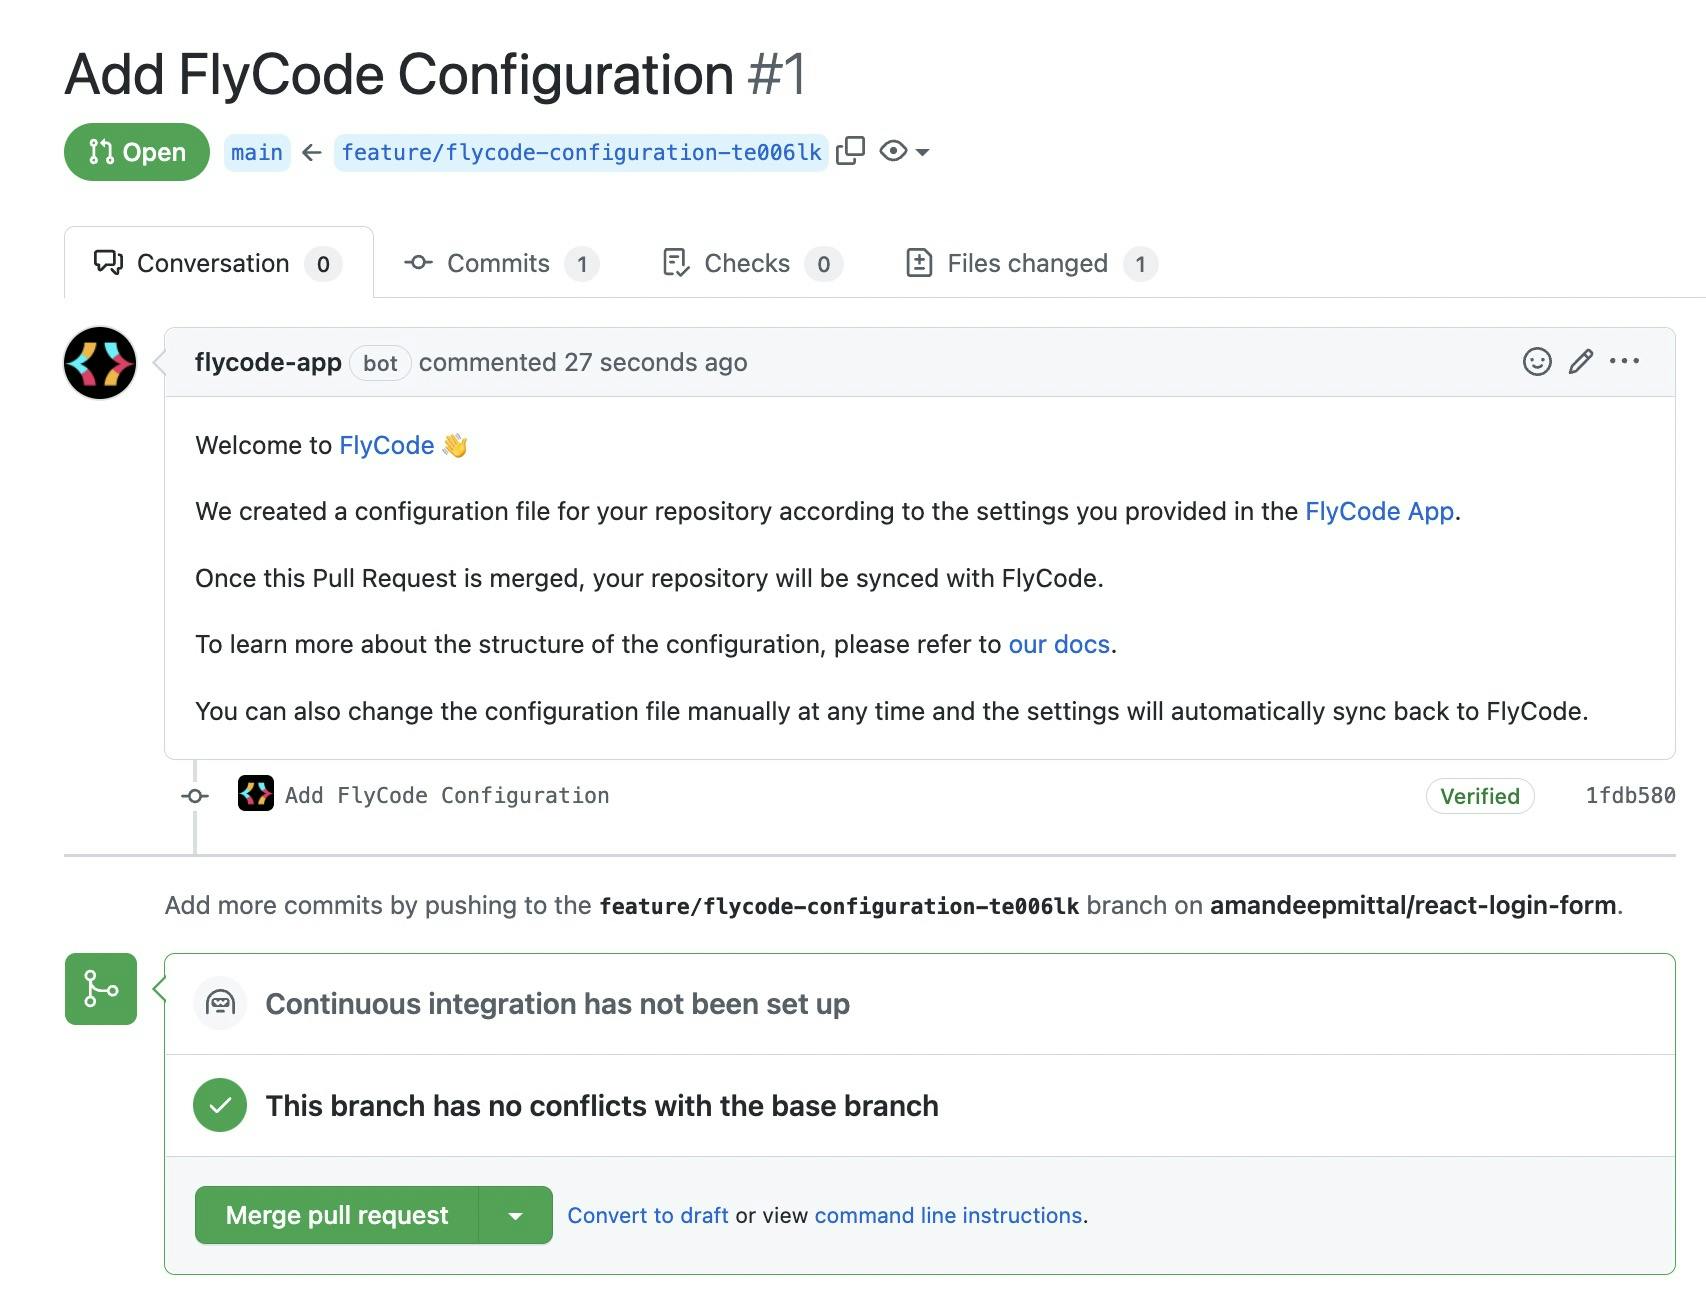
After merging the PR, go back to the configuration steps and press the button to complete the configuration.
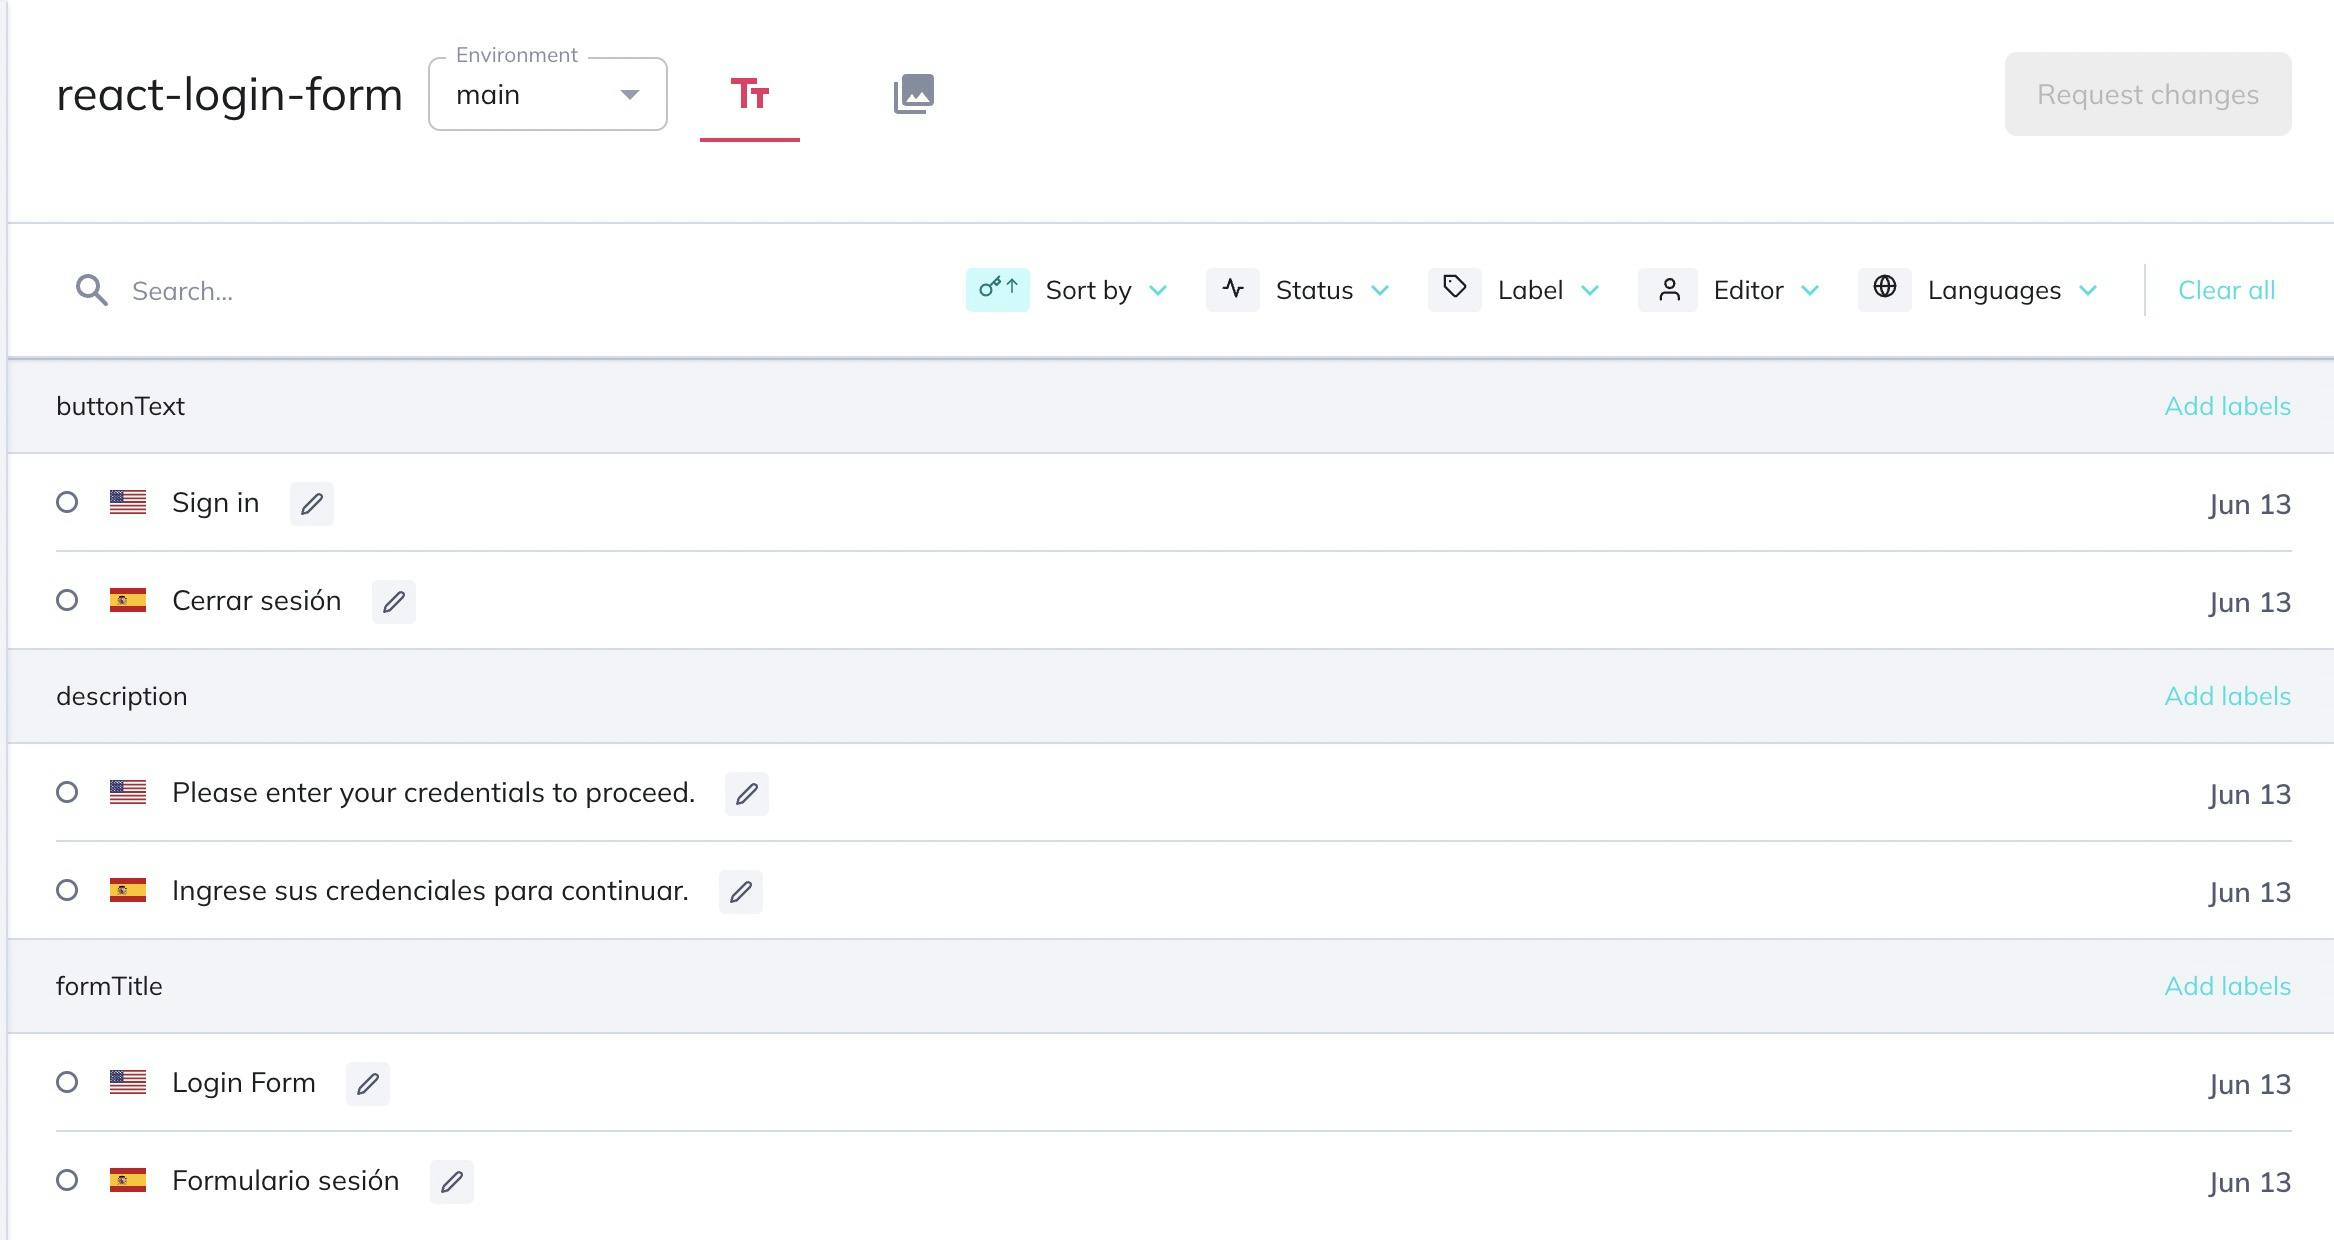
After this step, you can see the translations in FlyCode.
Making changes to translated text directly from FlyCode
The first translated text for Sign in in es locale is inaccurate. Let's fix this using FlyCode.
From the FlyCode project dashboard, edit it to its correct translation: Iniciar sesión as shown below:
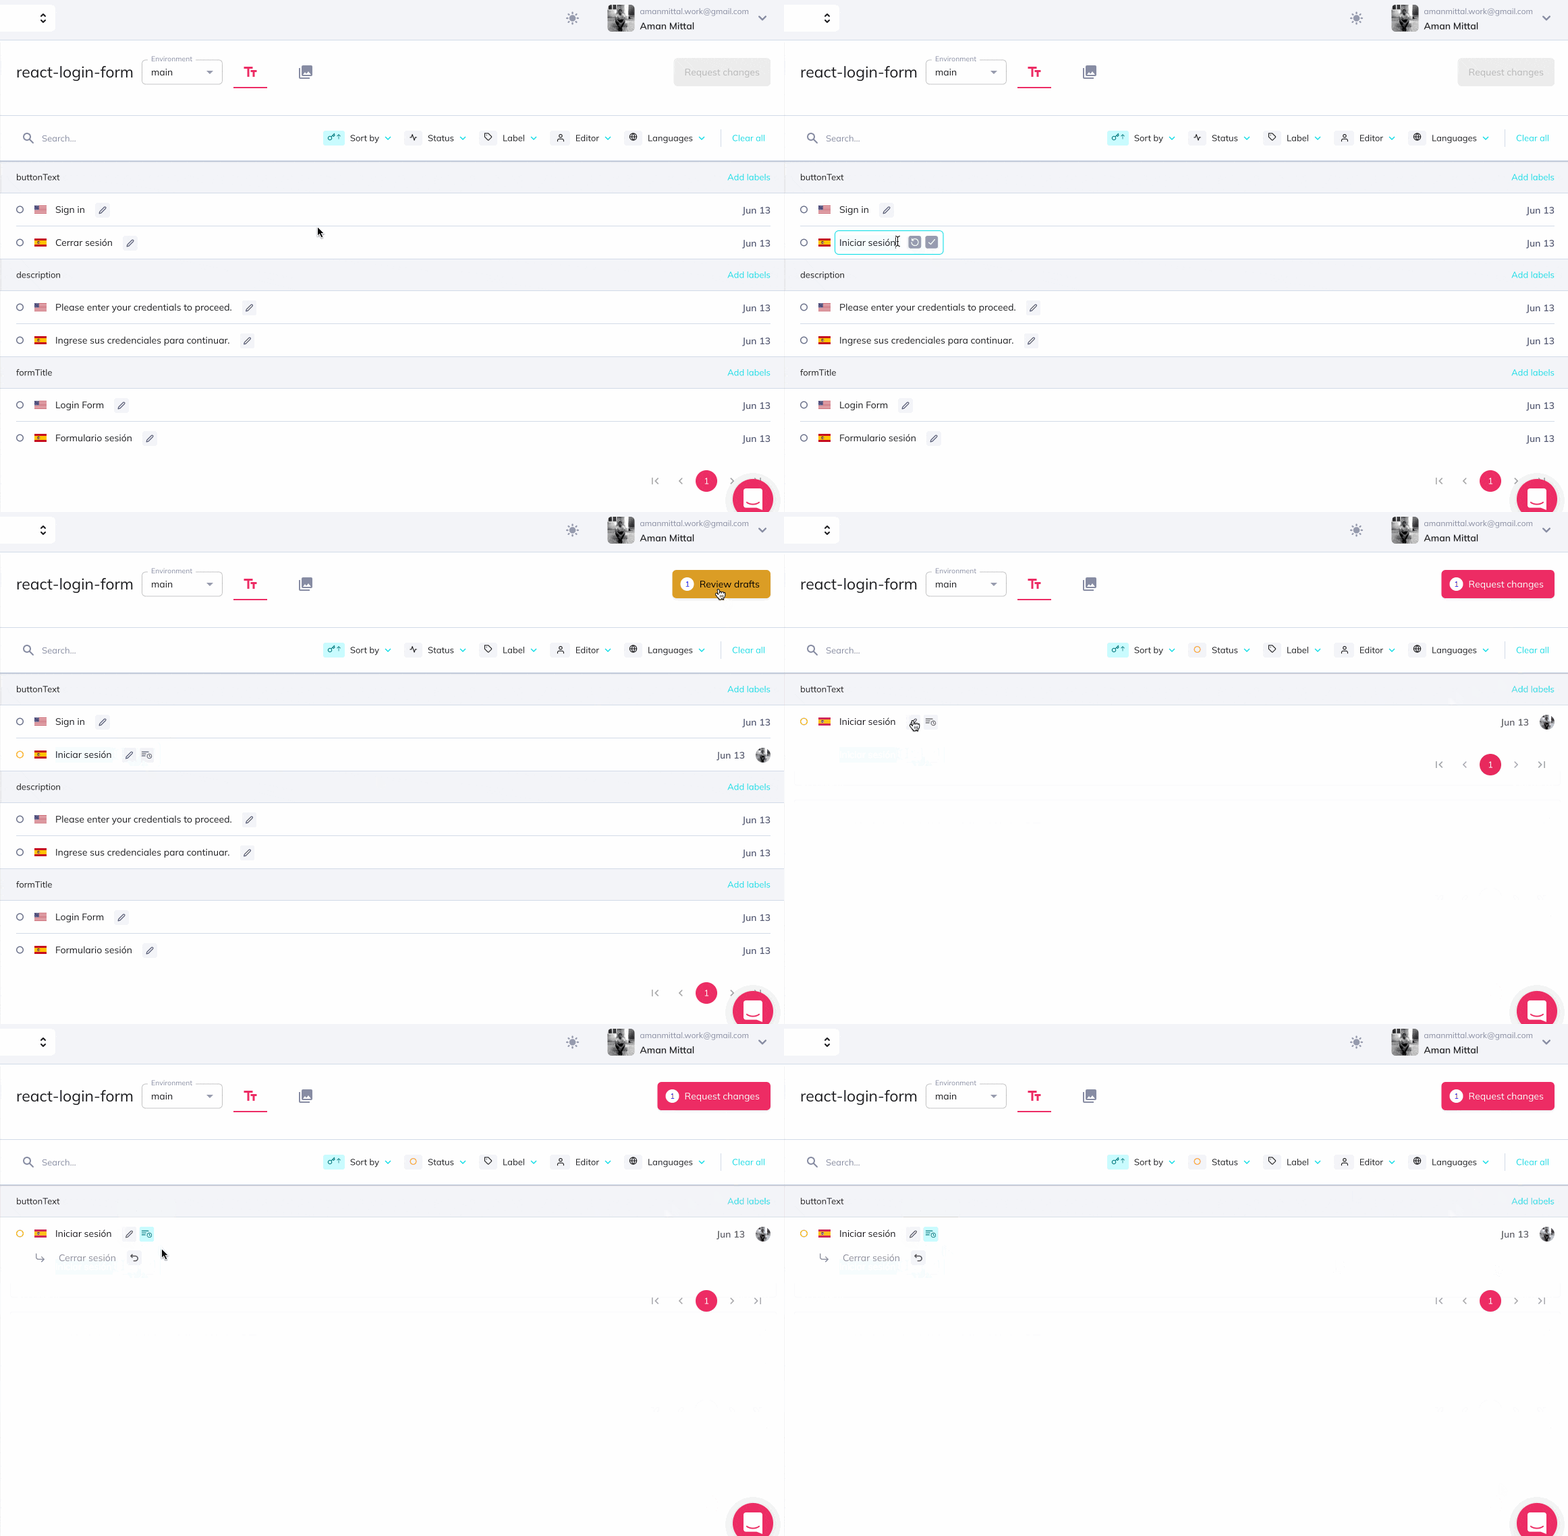
This will create a draft for the FlyCode project. Once you think it is ready to be changed, you can directly request changes from the FlyCode project by pressing the "Request changes" button. You can also add a message about the changes being requested.
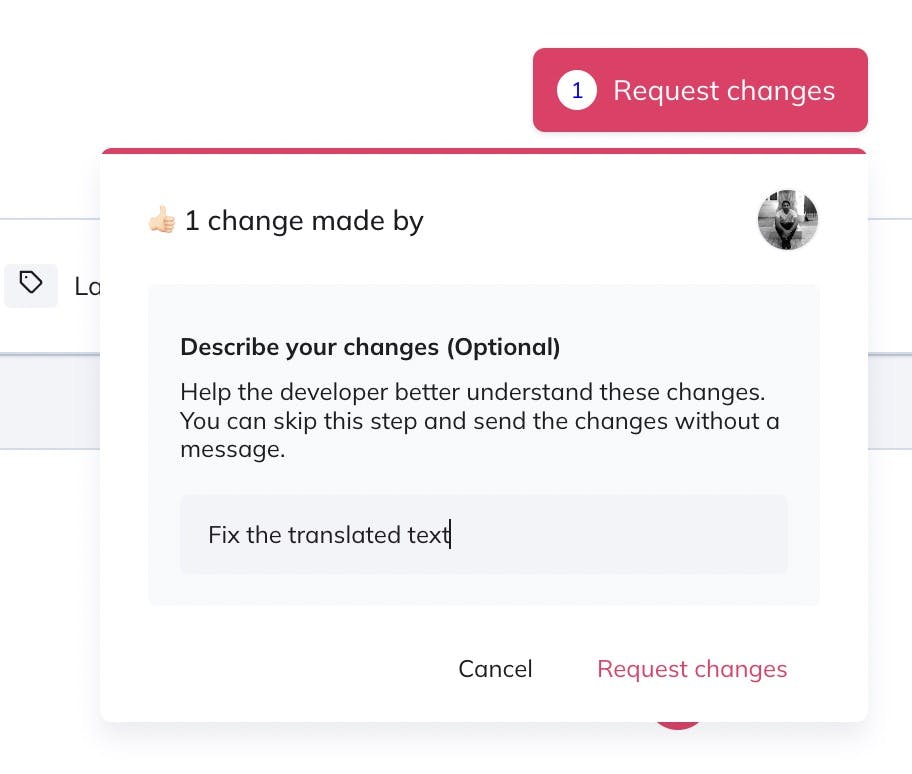
After requesting the changes, you will see a red status in front of the text that indicates that the change is pending approval.

FlyCode will send a PR to your GitHub repository to add the changes. Then, you can merge that PR to accept the changes requested.
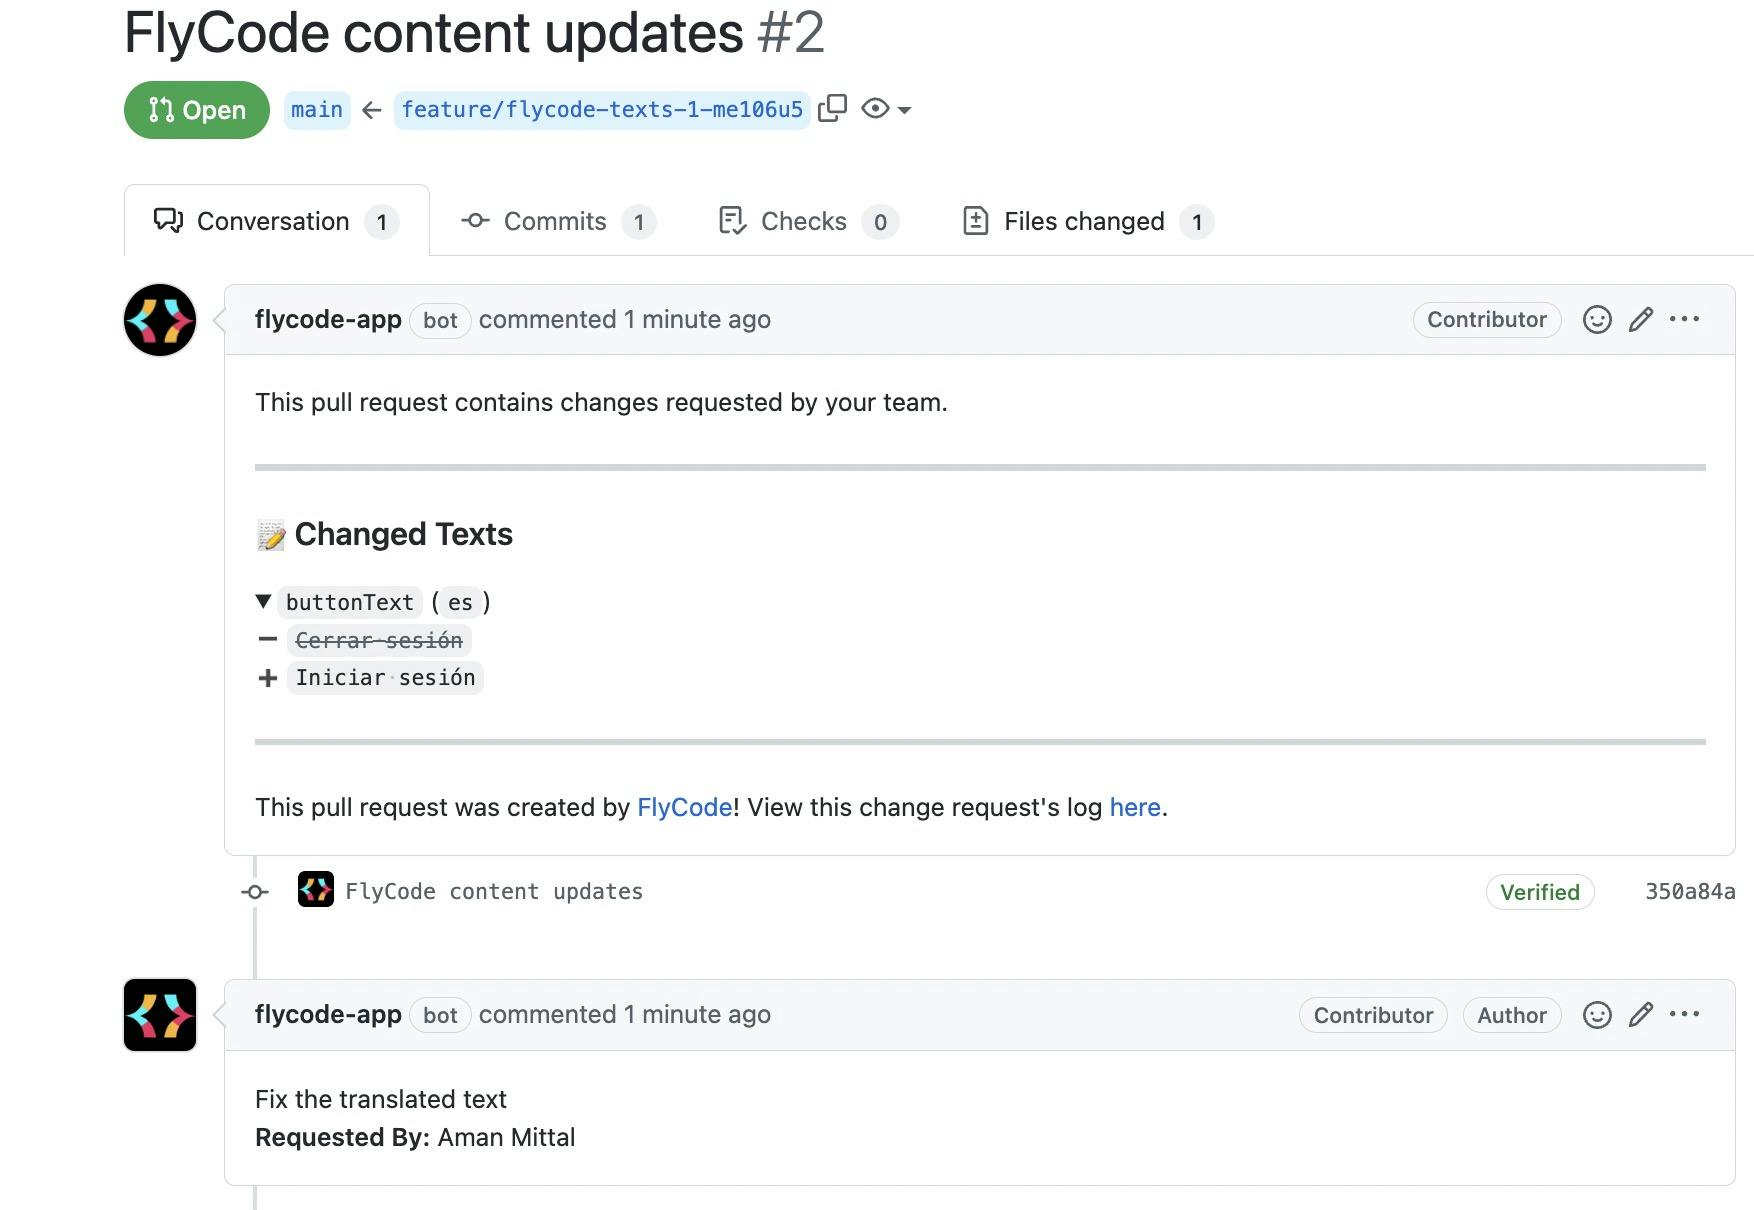
After the PR is merged, the FlyCode project is automatically updated to reflect these changes.

Conclusion
That's how simple the process for managing translation without touching the React app code using FlyCode is. To learn more about FlyCode, check their official documentation.

