

How to Deploy a Static Website for Free Using Github Pages
Learn how to host a multi-page static website for free using GitHub Pages in seven steps only.

Getting started on a solopreneur journey alongside my 9-5. 🚧 Documenting my learnings and progress on Twitter (X). ✍️ Software Engineer. 💻
GitHub is an excellent platform for saving your code projects and working with your colleagues. But did you know that they also offer a free hosting solution called Pages?
This feature is helpful to deploy your static websites (HTML, CSS, and JavaScript) like a portfolio, project documentation, or anything that you want! It even allows you to configure a custom domain name (but we’ll focus only on the hosting part in this tutorial).
But, there is one limitation, since it’s a static service, it does not support server-side scripts (PHP, Python, etc.).
Are you ready to dive in? 🤿
1. Create a new GitHub repository
As mentioned above, we’ll use GitHub Pages to host our static website. In this first step, you will need to create a new repository on your account.
Note: If you don’t have a GitHub account yet, you can create one on the homepage.
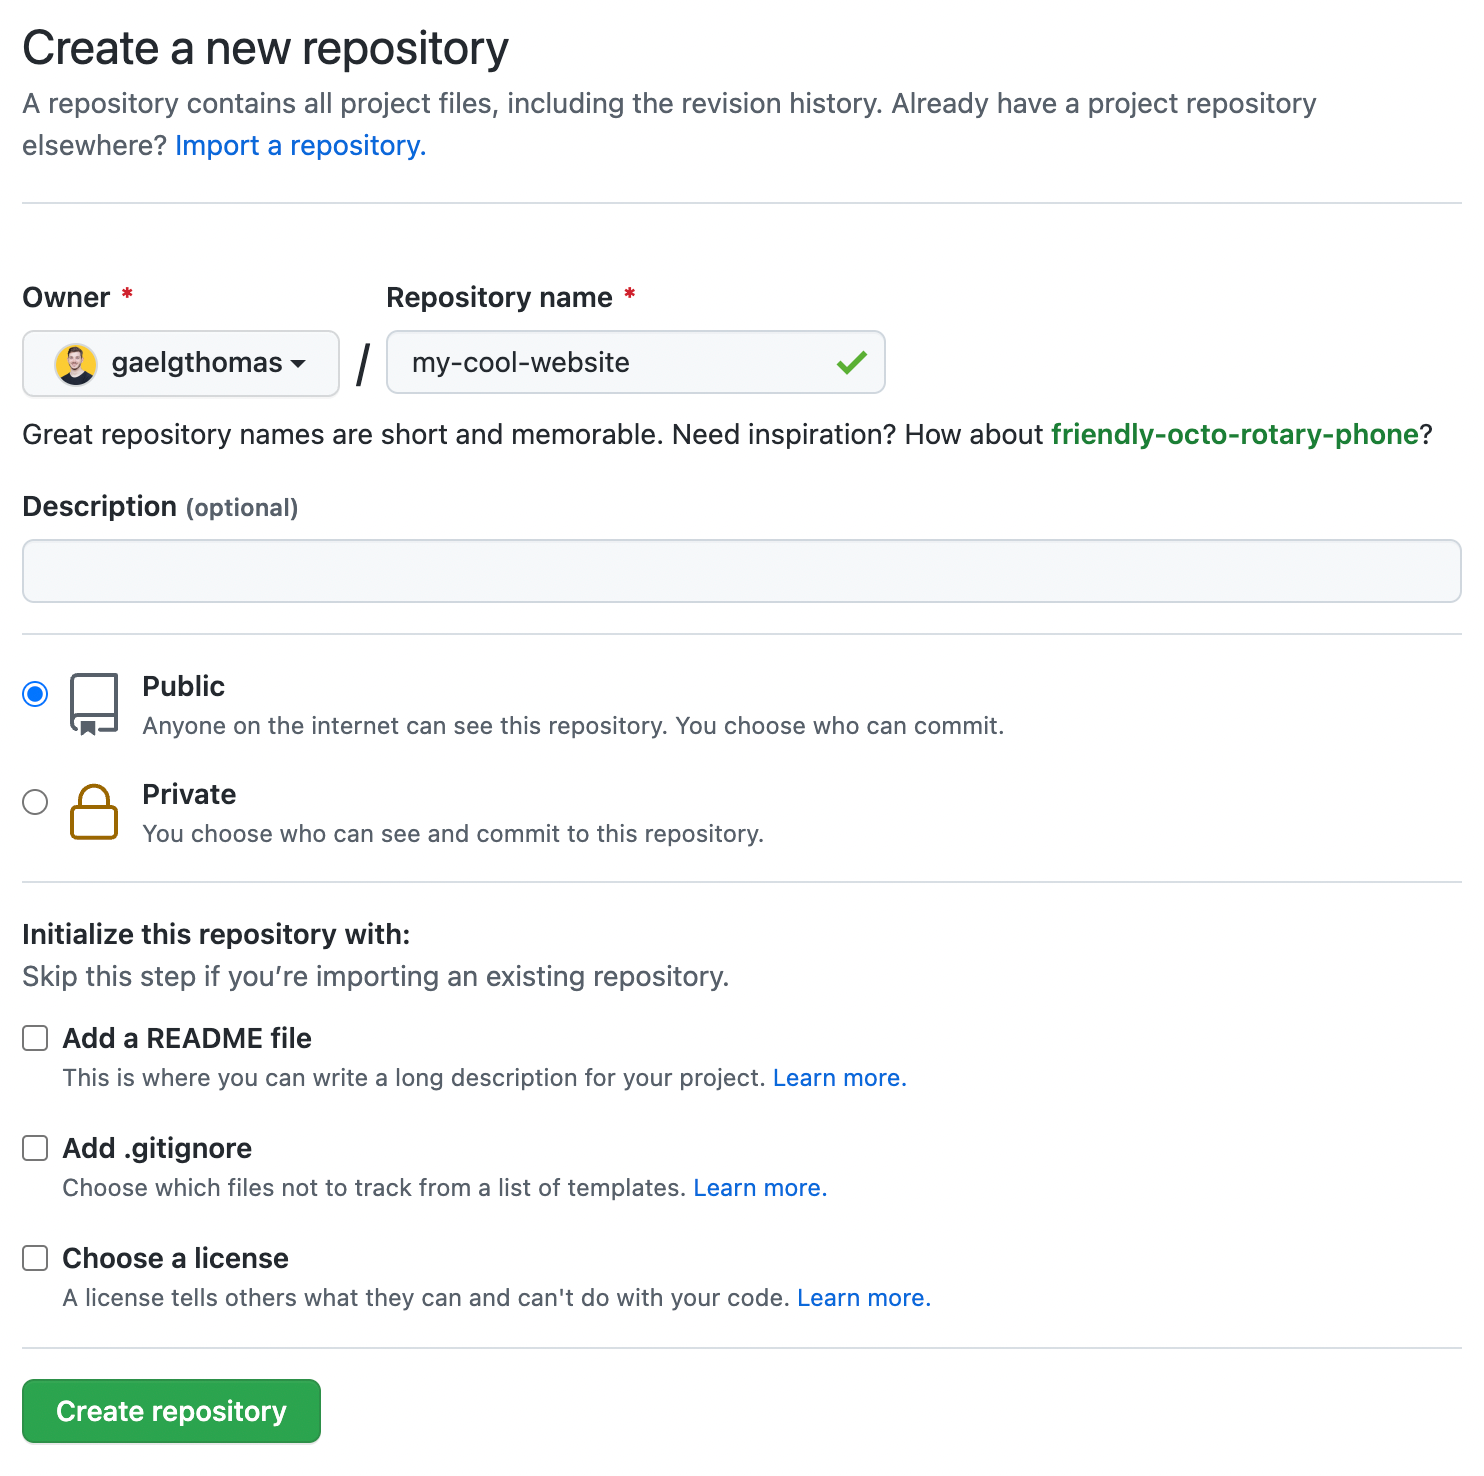
To do so, open the “Create a new repository” page on GitHub.
Feel free to choose a funky name for your repository! 🎸🤘 But, take care because this name will be one part of your website URL.
For this tutorial, I will name my repository: “my-cool-website”.
2. Clone the repository on your computer
Once you created your repository, you will be redirected to its page. There, you can copy/paste the HTTPS or SSH link and clone the repository on your computer.
$ git clone [HTTPS or SSH URL]
3. Create a static website
Time for creativity! 🎨
I invite you to open your repository in your favorite IDE (VSCode isn’t it? 😉) and create an index.html file. It will be the entry point of our website.
Below is the template that I will use.
<!DOCTYPE html>
<html>
   <head>
      <title>My Cool Website</title>
   </head>
   <body>
      <h1>Welcome to my website! ⭐️</h1>
      <p>How was your day? 🎉</p>
   </body>
</html>
4. Push your code to GitHub
Are you satisfied with your index.html file? If not, don’t worry. You’ll learn how to update it later in the coming steps! ⏭
When your code is ready, you will need to save it on GitHub. You can type the commands below to do it:
$ git add index.html
$ git commit -m "Initialize website"
$ git push origin main
Until here, you must be doing the same thing as for your other GitHub projects.
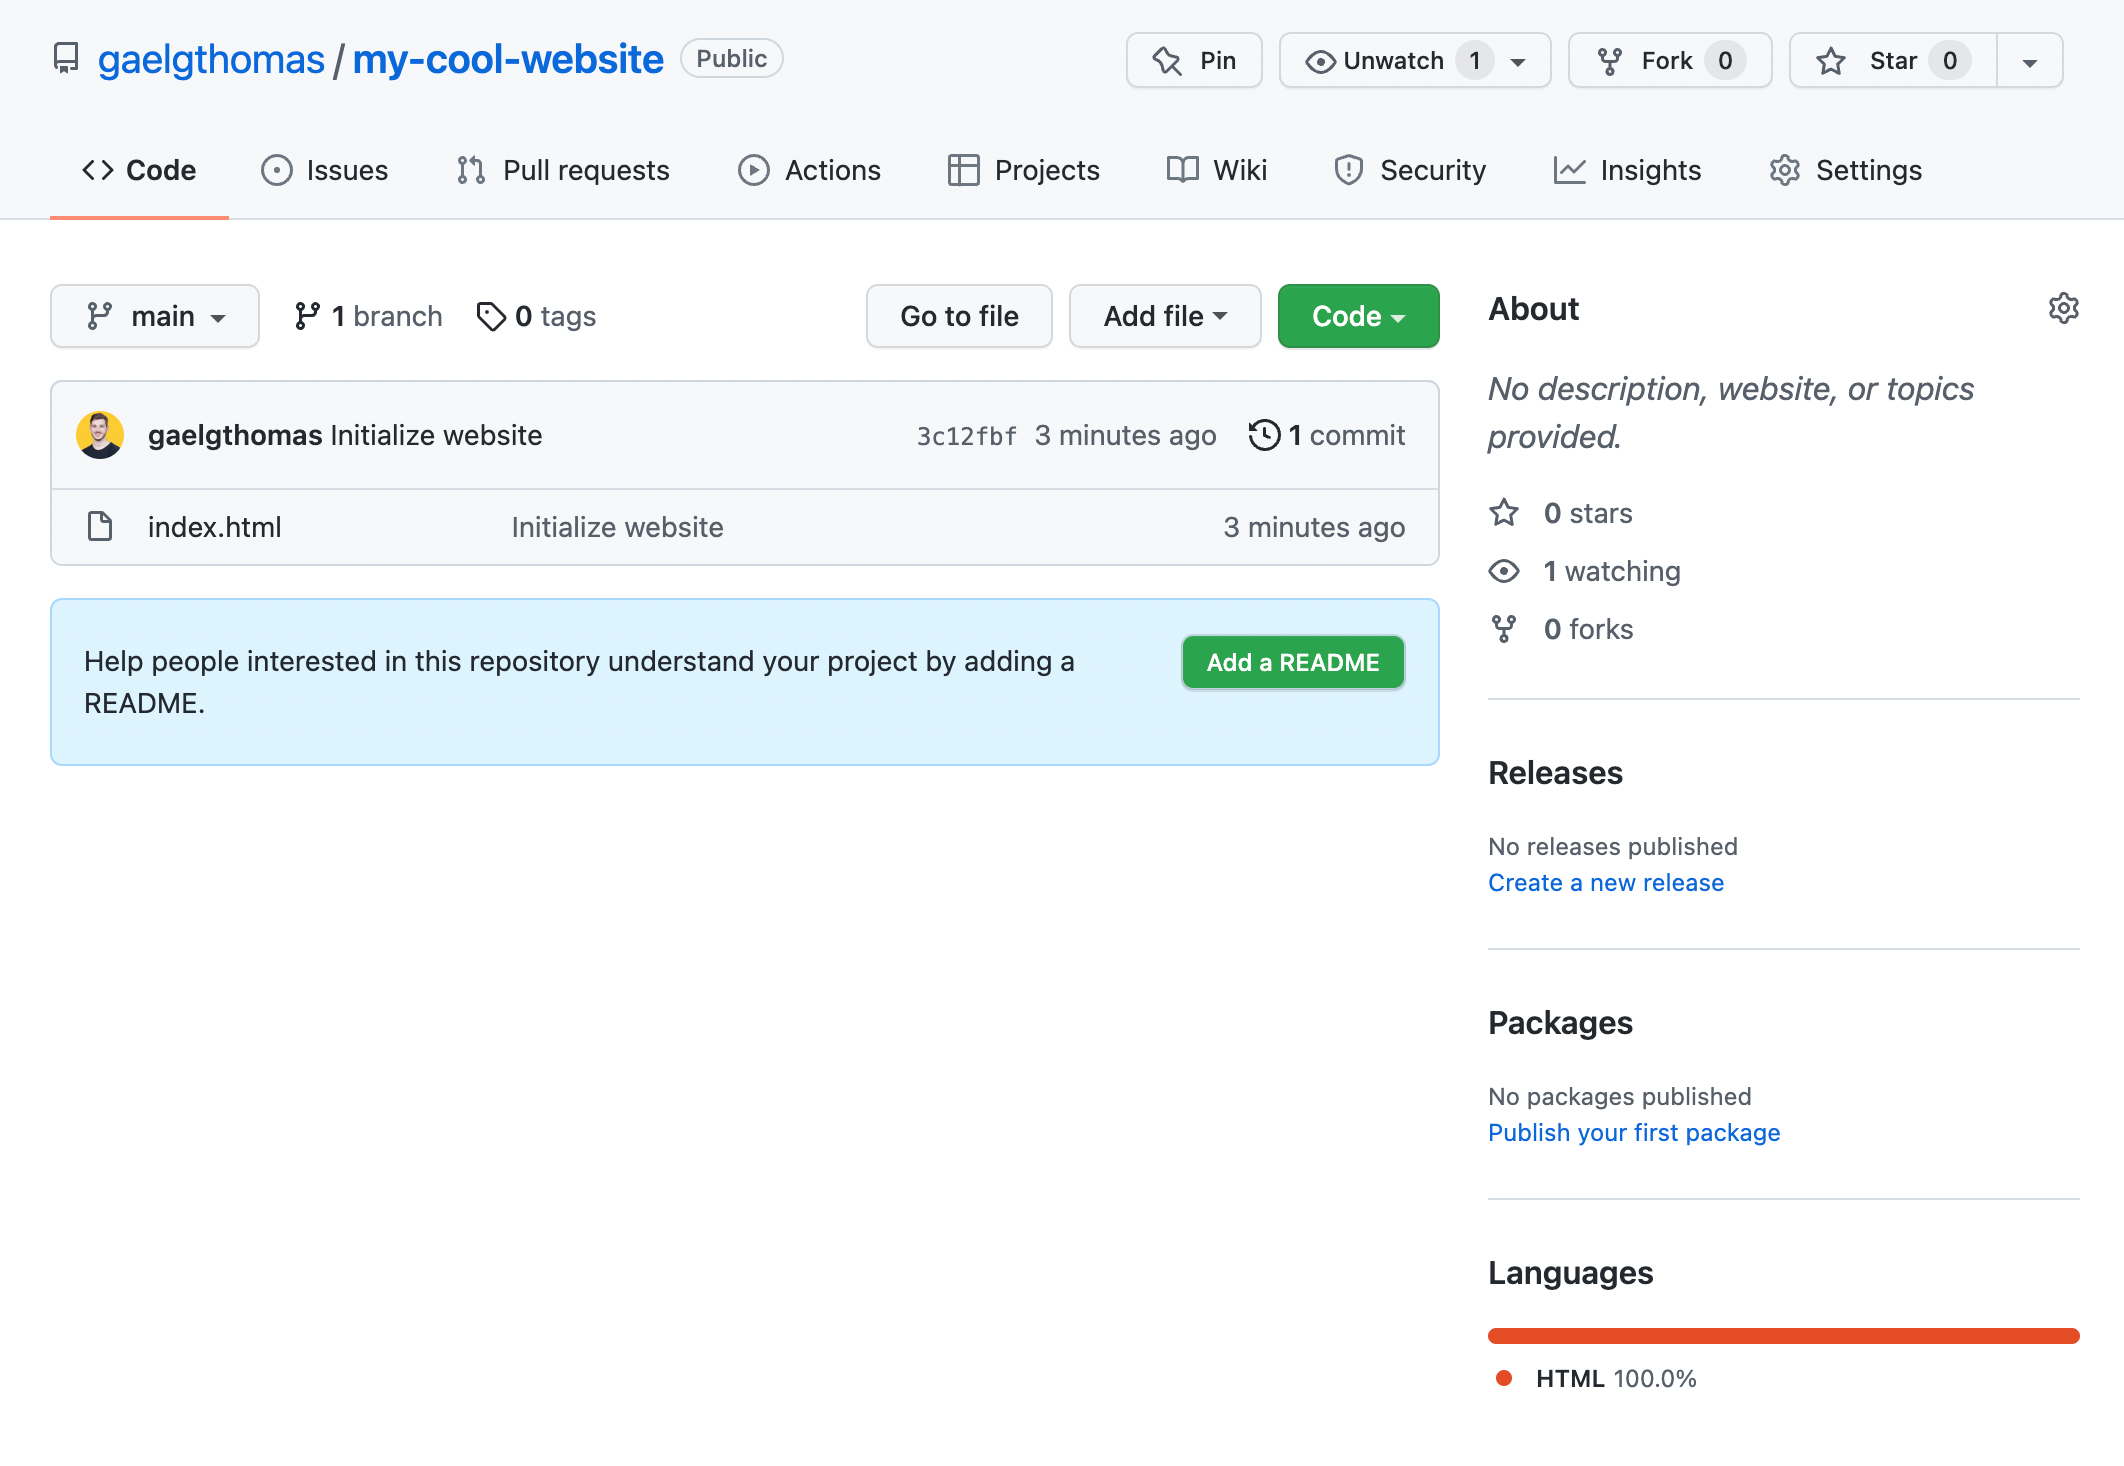
To verify that everything is working correctly, you can open your repository on GitHub and verify that the index.html file is displayed. If so, you’re ready for the next step!
5. Open your repository settings
Let’s deploy your website and make it available to the world! 🌐
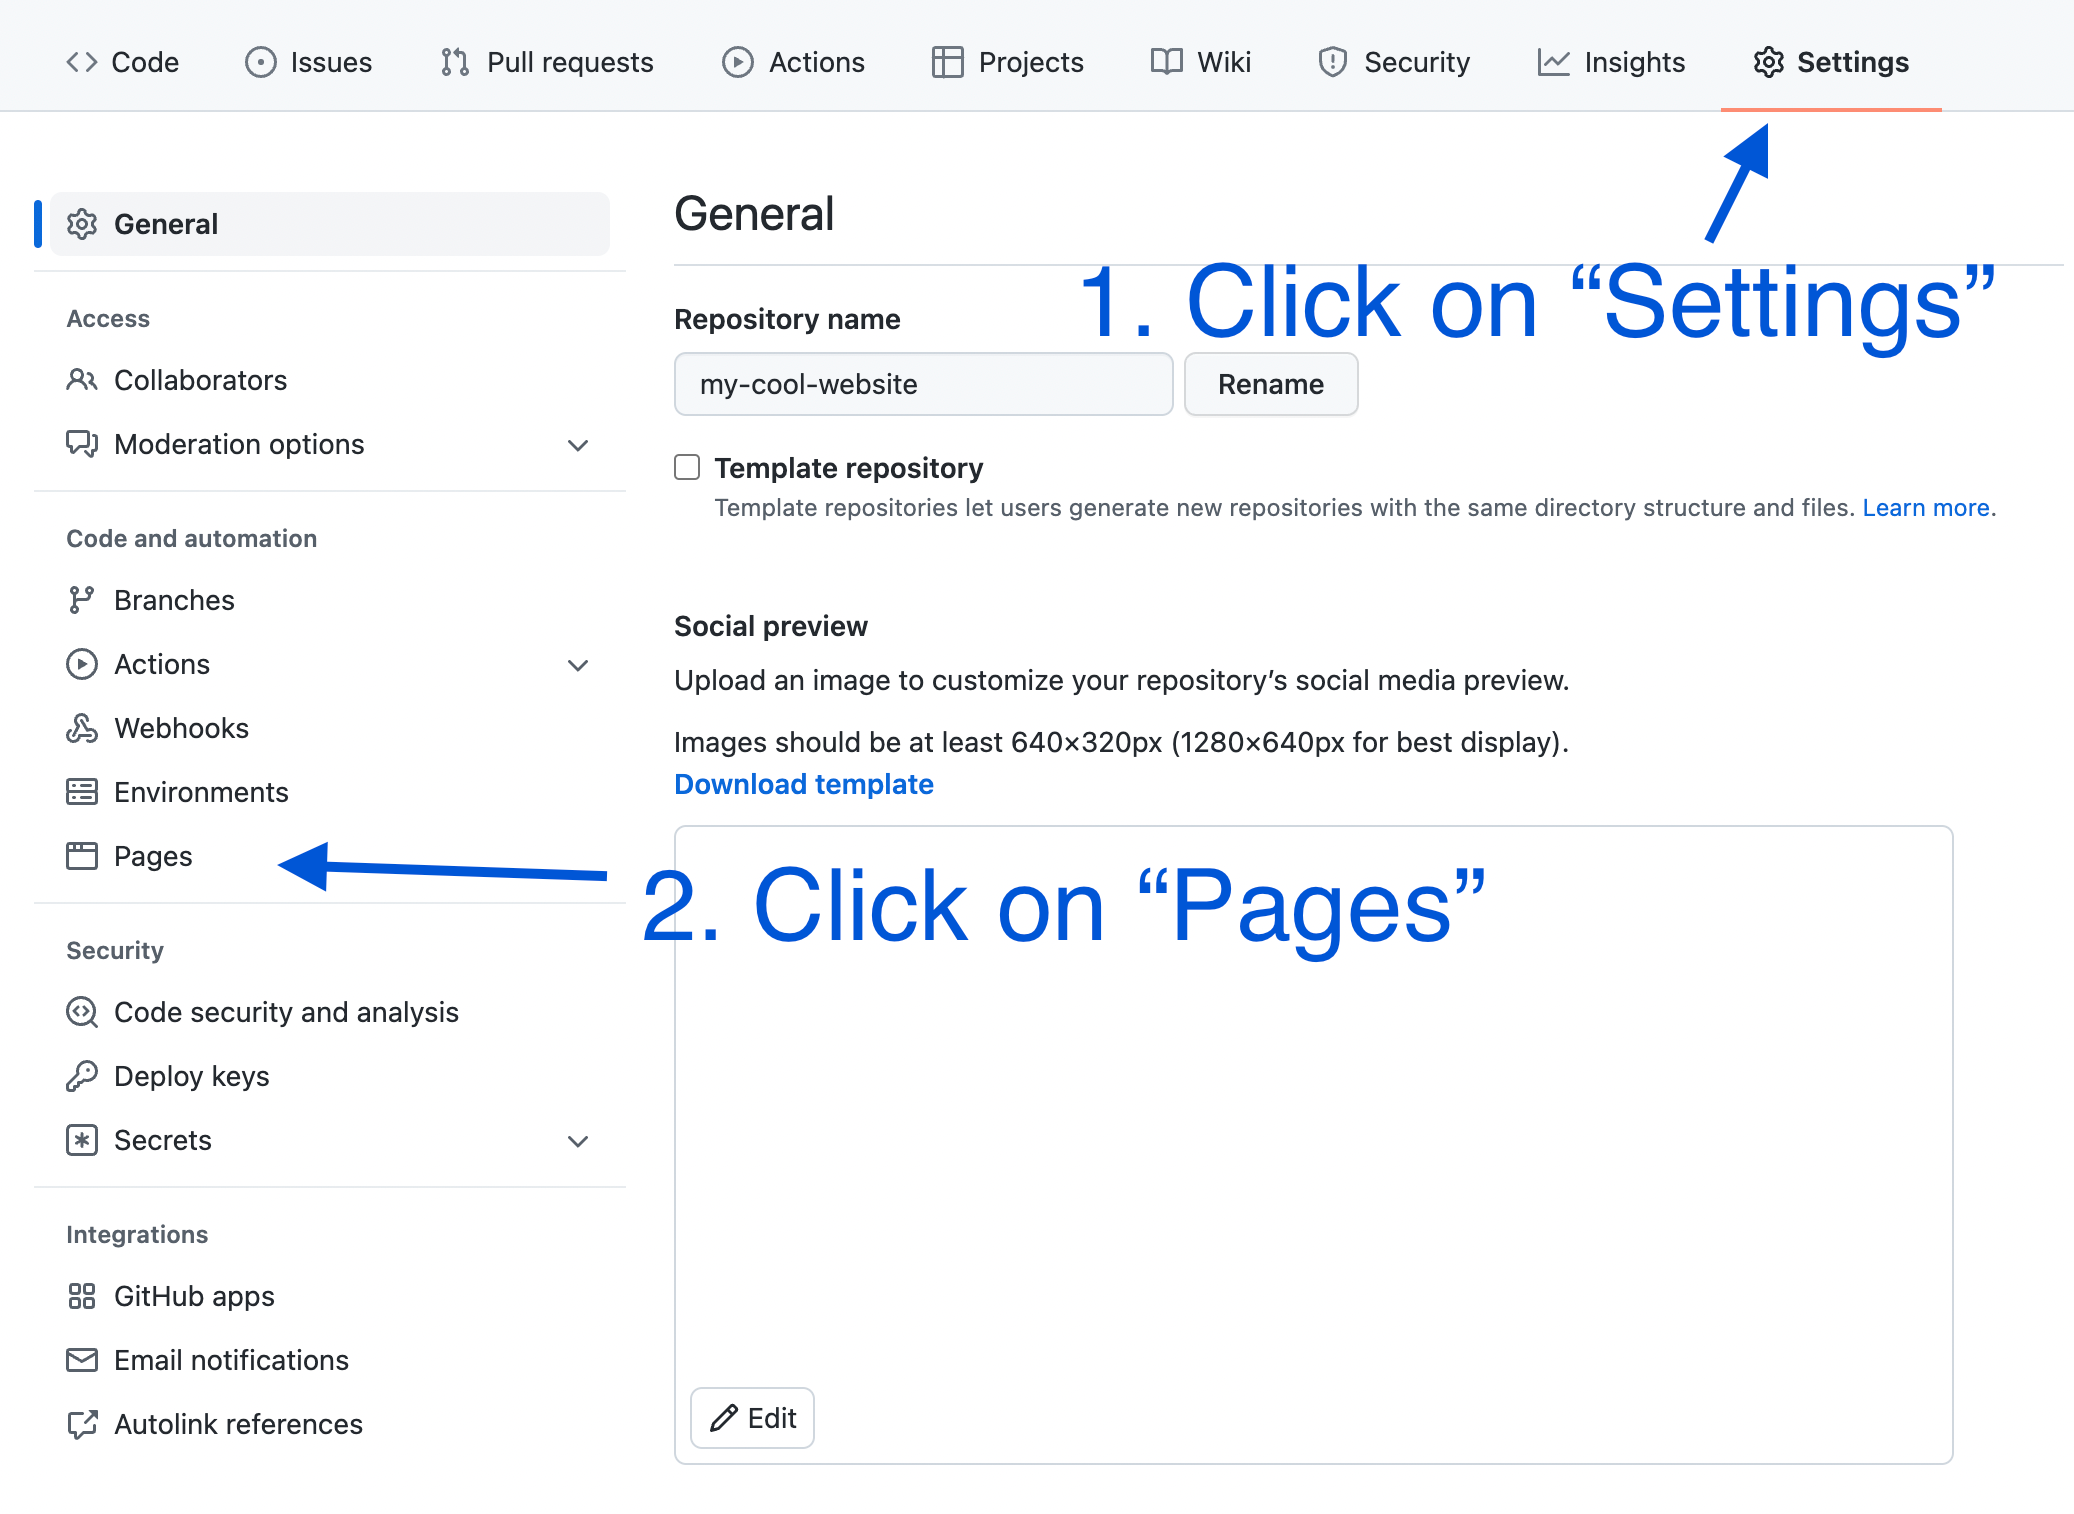
On your repository page, you have a menu at the top. Click on the image below on the last option called “Settings”, then “Pages” in the sidebar.
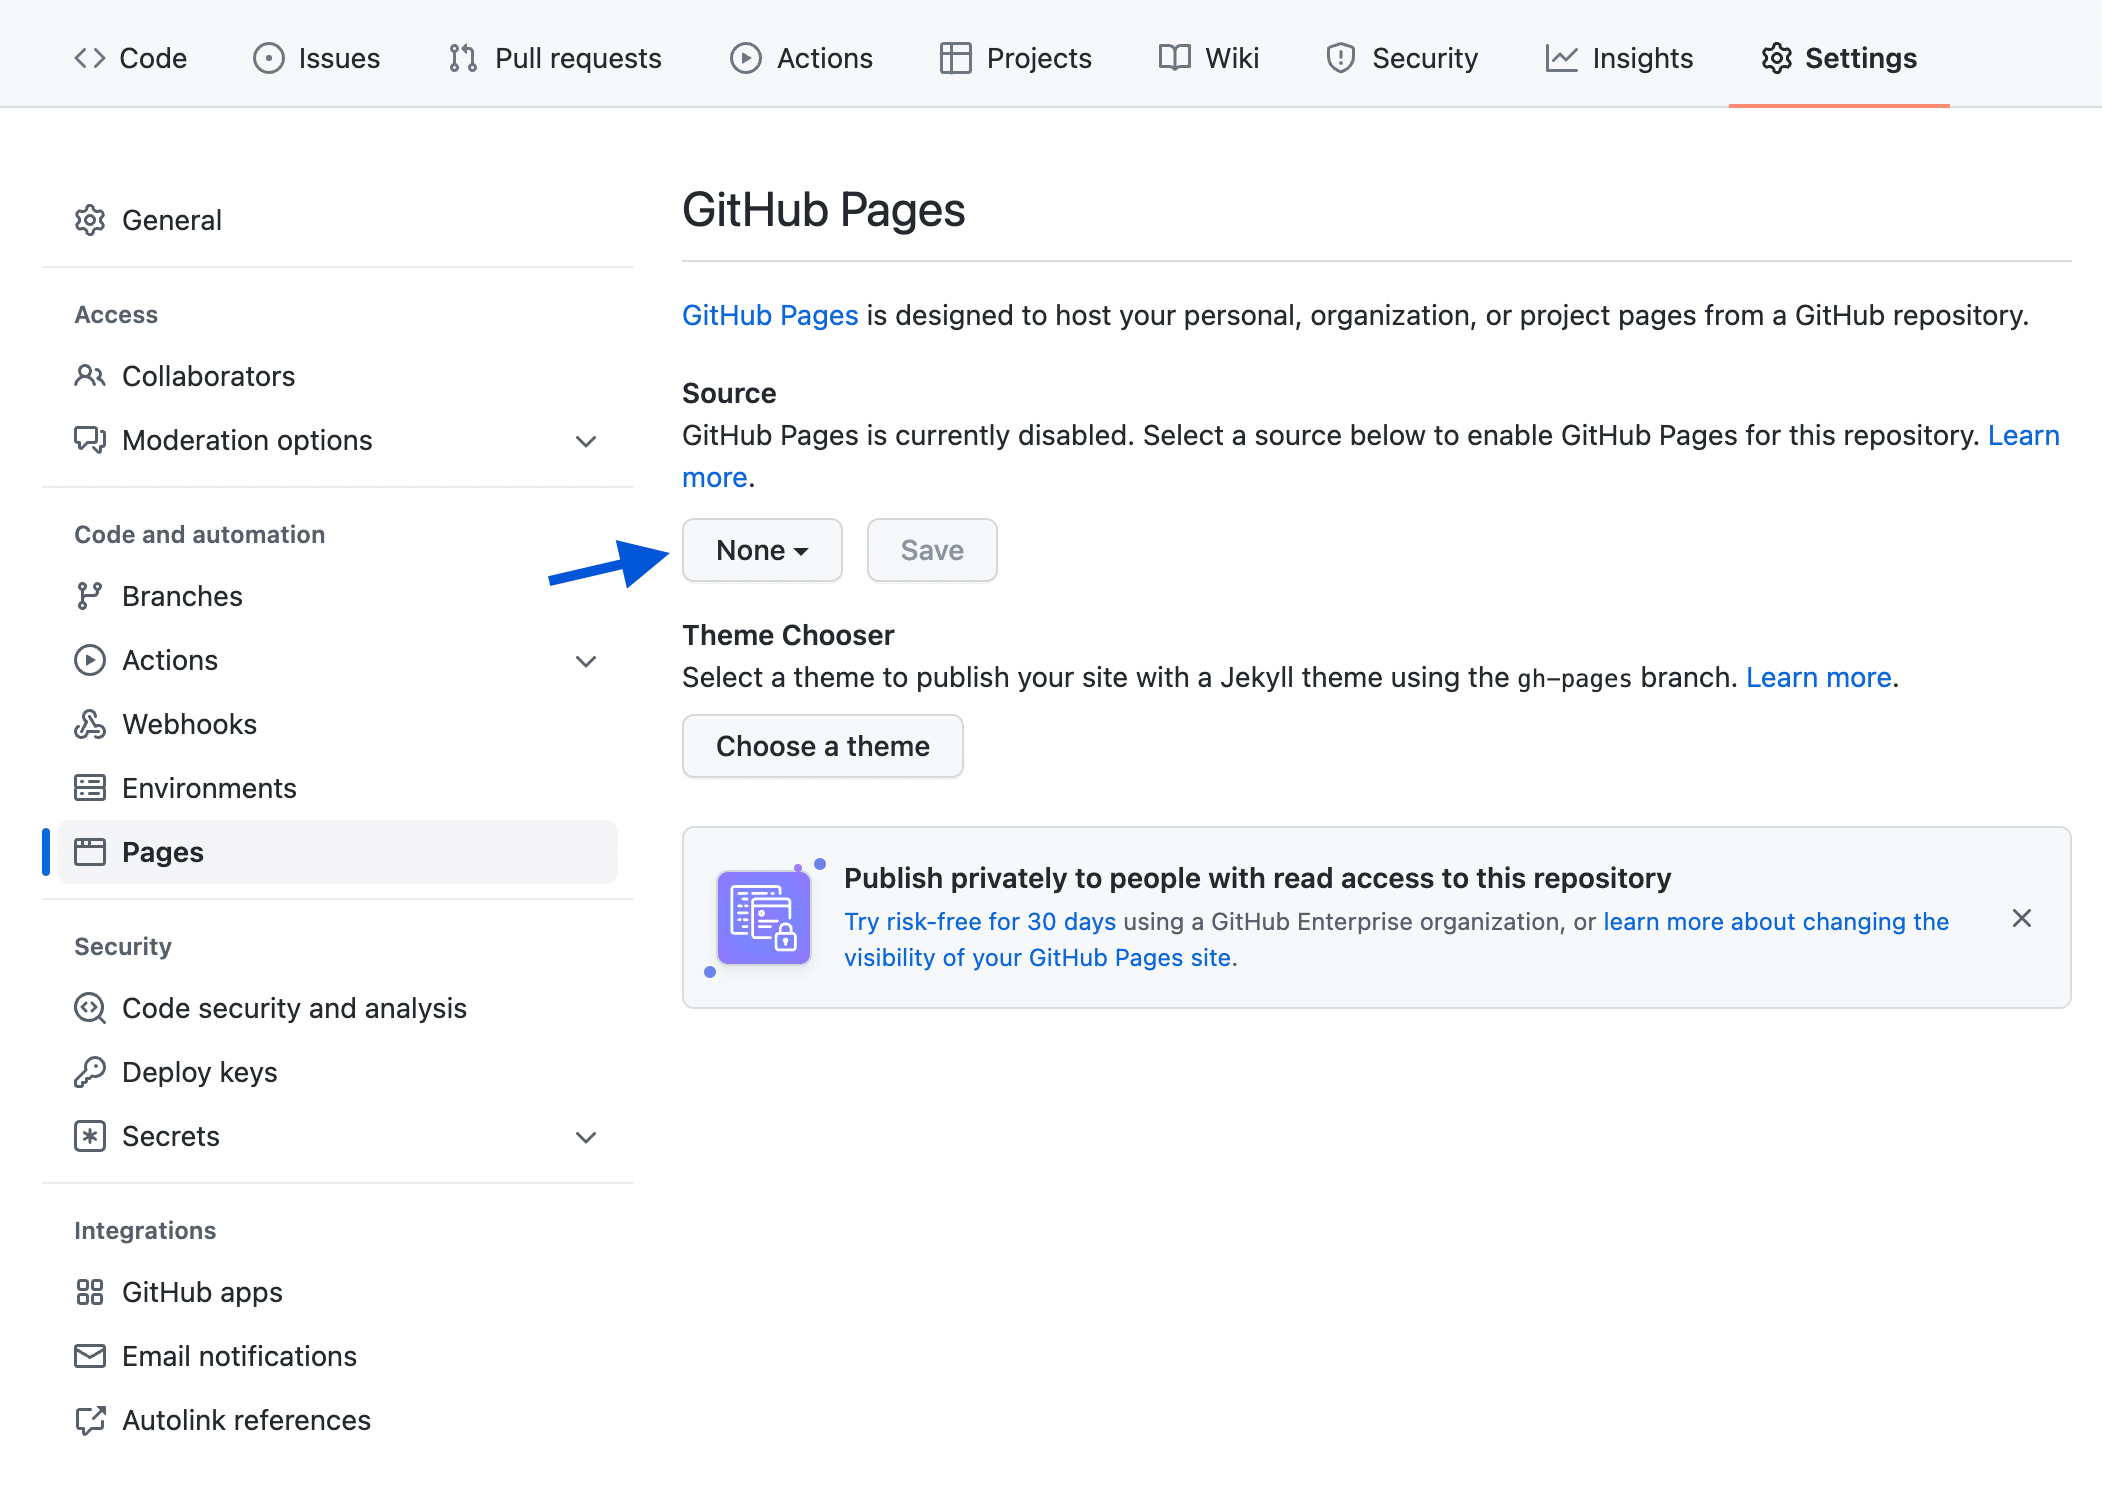
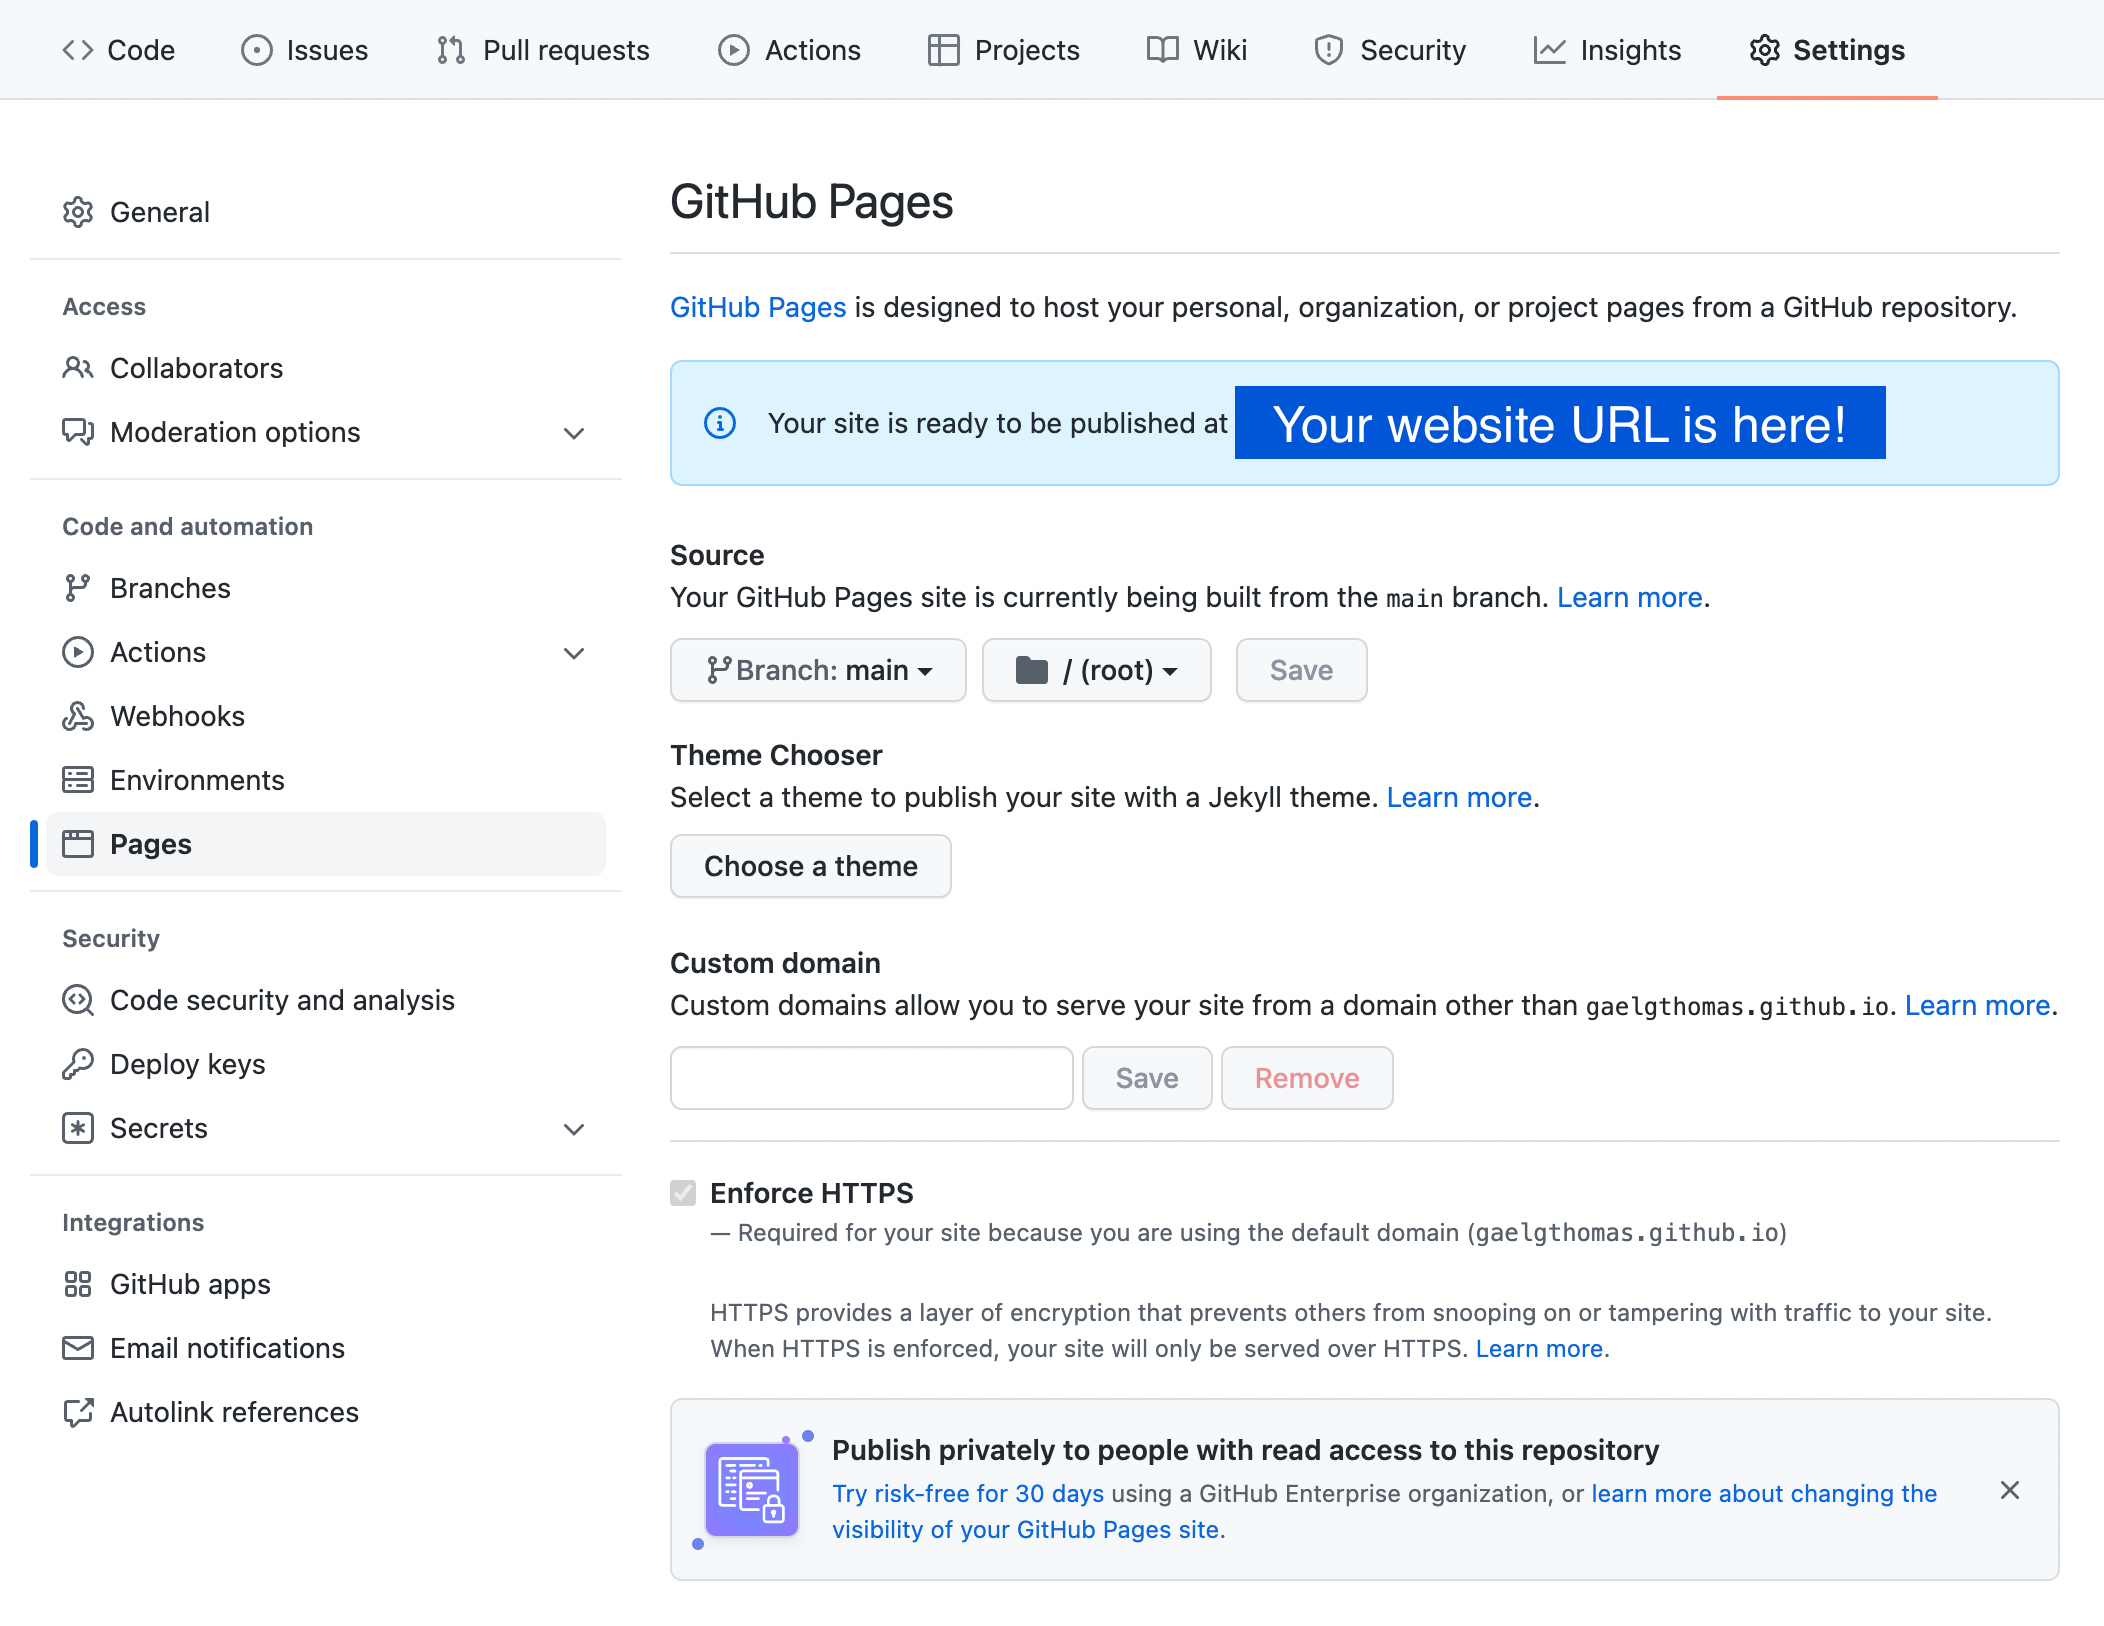
After clicking on “Pages”, you will land on the GitHub Pages configuration. That’s where you will ask GitHub to deploy your website online and create an URL for it.
Two settings are available:
The deployment branch: which branch of your repository will be deployed.
The deployment folder (by default “/ root”): which repository folder you want to use as an entry point. I recommend you stick to the default option. But, you will see that you can also select “/docs” if you want to create a GitHub website for your documentation pages (stored under the “/docs” repository.
Let’s stick to the most default options and select “main” as your deployment branch and keep “/ (root)” as the deployment folder.
Once you click on the “Save” button, the page reloads, and… TADA! 🥁
Your website is live! 🎉
Note: As you can see, the URL is based on your GitHub username and repository name. https://github-username.github.io/repository-name/
Let’s click on your URL to see the online version of your website.
Here’s mine!

6. Add a new page
Talking about improvements, one page is not a lot for a website. What do you think about creating a new page? 📃
Now that everything is set up let’s return to our IDE and create an about.html page.
As we did with the index.html Feel free to create the code of your choice!
Here is the template I will use for this new page:
<!DOCTYPE html>
<html>
   <head>
      <title>About - My Cool Website</title>
   </head>
   <body>
      <h1>About my website! 🎙</h1>
      <p>Thanks for following this tutorial. 🙏</p>
   </body>
</html>
Then, let’s create a button on the homepage (index.html) to open the about page with a click.
<!DOCTYPE html>
<html>
   <head>
      <title>My Cool Website</title>
   </head>
   <body>
      <h1>Welcome to my website! ⭐️</h1>
      <p>How was your day? 🎉</p>
      <a href="./about">Read the about page</a>
   </body>
</html>
7. Update your website
A new page is born! Let’s make it real! 🆕
The last step of this tutorial will teach you how to update your static website after its first release.
Now that everything is configurated, we will refer to step 4, “Push your code to GitHub”. In this previous part, we pushed our code to our repository. Here, the process will be the same with our new updates.
We want to save our about.html page and update the index.html with the new changes.
Let’s do it using the same Git commands as step 4.
$ git add index.html about.html
$ git commit -m "Add an about page"
$ git push origin main
Once it’s done, wait a few minutes, come back to your website URL, reload, and your changes should appear!


Wrapping up
Thanks for following this tutorial! I hope you learned more about the GitHub Pages while reading it.
At FlyCode, we regularly deliver content about Git and GitHub. If you don’t want to miss them, I invite you to follow us on Twitter.


